Difference between revisions of "User:Bobbanz/Sandbox"
| Line 1,251: | Line 1,251: | ||
<span style="font-size:1.2em;">A hybrid Railgun Weapon, capable of switching between firing Railgun Slugs and Deck Gun Shells.</span> | <span style="font-size:1.2em;">A hybrid Railgun Weapon, capable of switching between firing Railgun Slugs and Deck Gun Shells.</span> | ||
<div class="mw-collapsible-content"> | <div class="mw-collapsible-content"> | ||
| − | + | The Coaxial Railgun is a weapon that uses both Power and Physical Ammunition to fire a range of projectiles at the enemy vessels, however due to its mechanical parts, the thing requires maintenance from time to time. | |
| − | The Coaxial Railgun | + | The Coaxial Railgun, much like all railguns, uses electricity to produce a magnetic field in order to rapidly accelerate their ammunition, it is due to this reason that you need to keep an eye on the magnetic alignment of the field. |
| + | |||
| + | If the field degrades too much it will affect the projectile velocity and increase the chances of a misfiring incident occurring. | ||
The weapon is capable of being switching configuration between firing Railgun Slugs and Deck Gun Shells pretty easily. | The weapon is capable of being switching configuration between firing Railgun Slugs and Deck Gun Shells pretty easily. | ||
| Line 1,259: | Line 1,261: | ||
Operating the Railgun is a relatively easy thing to do: | Operating the Railgun is a relatively easy thing to do: | ||
# Interact with the weapon to bring up its UI. | # Interact with the weapon to bring up its UI. | ||
| − | # Drag the Power Allocation slider to the users desired allocation of power. | + | # Drag the Power Allocation slider to the users desired allocation of power. '''Please note that this will result in a passive drain on the vessels power supply, so do not do this until the engine is setup and working properly.''' |
# Switch Configuration "I4- Configuration:" to the Ammunition of Choice, options being Railgun Slugs and Deck Gun Shells: [[File:Railgun_ammo.png]] [[File:NACShells.gif]] | # Switch Configuration "I4- Configuration:" to the Ammunition of Choice, options being Railgun Slugs and Deck Gun Shells: [[File:Railgun_ammo.png]] [[File:NACShells.gif]] | ||
# Insert the ammunition you have chosen, if it's Railgun slugs then insert 5 Railgun Slugs into the Weapon, otherwise insert 1 Deck Gun Shell that has been armed: [[File:Railgun_ammo.png]] [[File:NACShells.gif]] | # Insert the ammunition you have chosen, if it's Railgun slugs then insert 5 Railgun Slugs into the Weapon, otherwise insert 1 Deck Gun Shell that has been armed: [[File:Railgun_ammo.png]] [[File:NACShells.gif]] | ||
| Line 1,268: | Line 1,270: | ||
====Maintenance==== | ====Maintenance==== | ||
| − | The Coaxial Railgun requires maintenance when its used too much. You probably want to perform maintenance between each bout of combat.<br> | + | The Coaxial Railgun requires maintenance when its used too much and when the Magnetic Alignment is out of align. You probably want to perform maintenance between each bout of combat.<br> |
| − | Note: make sure there's nothing in the weapon and that the safeties are on | + | Note: make sure there's nothing in the weapon and that the safeties are on. |
| + | |||
| + | In order to restore the Magnetic Alignment do the following: | ||
| + | # Unscrew the maintenance hatch on the primary external casing | ||
| + | # Unbolt (wrench) the internal maintenance panel | ||
| + | # Restore the Alignment using a Multitool | ||
| + | # Bolt (wrench) the panel. | ||
| + | # Screw the maintenance hatch back into place. | ||
| + | |||
| + | In order to repair the Gun Condition do the following: | ||
# Unscrew the maintenance hatch on the primary external casing | # Unscrew the maintenance hatch on the primary external casing | ||
# Unbolt (wrench) the internal maintenance panel | # Unbolt (wrench) the internal maintenance panel | ||
Revision as of 03:11, 24 February 2023
Mission Objectives
 |
Staff Sergeant Angela Deth says: "Listen up people, cause I'm not going to scream this twice! I've lately heard from a little bird on the Grapevine that the Brass has finally gotten around to talking about assigning us a Mission, as such I've decided that it's time to refresh that brain of yours with the various possible assignments we might get. So let's get to it Marines!" |
At the start of every round the ship is given a randomly chosen assignment, this assignment has sub-objectives attached to it, which all need to be completed before you are allowed to vote on either, Continuing Onwards with a newly given Objective, or Returning to Outpost 45 for debriefing.
These objectives can be anywhere between having to calmly deliver supplies to some station, two jumps away from Rubicon, to downright having to plow through five Syndicate fleets, alongside a small pirate fleet, while the engine room is on freaking fire.
Patrol Duty
|
Staff Sergeant Angela Deth says: "Patrol Duty, the lifeblood of the navy and the only thing keeping the Syndicate on their toes, our navy from being mothballed and our guns from gathering dust. It also serves to remind the outlaws that although we might be in the middle of a war, we still have not forgotten about their existence." |
The Patrol Assignment is one out of four assignments you can potentially roll at the start of every shift depending on the amount of players.
The minimum amount of players required in order to roll this assignment is: 10 Players.
This assignment has a single Objective attached to it and that objective is to gather: 1000 Faction Points.
The current ways you can gather 1000 points is to do one, or more, of the following things:
- Hunt down Syndicate and Pirate Fleets.
- Capture Star Systems using the F.L.A.R.E. device which can be found in the Vault on certain maps.
Shakedown
|
Staff Sergeant Angela Deth says: "The vessel we're being assigned to is fresh from the shipyard, she hasn't even had her maiden voyage yet, nor has she earned any scars yet, but that's all in due time, currently we've been given the task of taking this lady out for a spin." |
Courier Duty
|
Staff Sergeant Angela Deth says: "Courier Duty, even in the middle of a war the mail still has to be delivered, no matter how many syndicate fleets we must plow through, whether we're delivering vital cargo that could help save a system, to simply delivering the party supplies some station at the front-line ordered. We're the one's who have to ensure it gets there, no matter what stands in our way." |
Boarding
|
Staff Sergeant Angela Deth says: "Remember the various times the Syndicate sent their little drop troopers to wreck havoc inside our ships? Well guess what Marines? Playtime's freaking over! I've just got word from command, we are going on a little field-trip of our own, in order to steal ourselves one of their Ships." |
The Boarding Assignment is one out of four assignments you can potentially roll at the start of every shift depending on the amount of players.
Test
The minimum amount of players required in order to roll this assignment is: 14 Players.
This assignment has a single Objective attached to it, with the objective in question being to Board and Capture a Marked Syndicate Vessel.
The Setup
Before you even consider boarding a Syndicate Vessel you need multiple things.
- You require a Target.
- The toughest part of boarding a ship, is to find a ship to actually board.
- You need a Pilot capable of flying the Sabre.
- You can have a squad of Midshipmen geared up for boarding duty, however unless you have a pilot capable of actually getting them somewhere, they're not going to be very useful.
- Make sure there is at least one backup pilot with you in the event that the first one eats a bullet.
- You can have a squad of Midshipmen geared up for boarding duty, however unless you have a pilot capable of actually getting them somewhere, they're not going to be very useful.
- Make sure everyone who's partaking in the boarding action is assigned into Squads.
- Those in squads have roles assigned to them, usually alongside a space-worthy suit of armor.
- Make sure everyone has a gun that's actually useful and not loaded with non-lethal ammunition.
- There are firing pins that only work during boarding actions, install them into those guns in order to ensure that nobody tries using them for something stupid back home, and to deny anyone seeking to return the favour from having multiple working weapons at their disposal.
- TBA
Death Wish
Before you can initiate the boarding procedure, you need to damage the targeted vessel to the point where it's point defense systems are no longer fully effective, which usually happens when the enemy vessel has around 50%, or less, of it's hull integrity remaining.
Upon which you need to lock it down which is called a Hammerlock
You can check if you are capable of hammerlocking an enemy ship by using this console. ![]()
That console is found on the Bridge, as such it's up to the bridge officers, or whoever is on the bridge, to hammerlock it.
Upon locking down a ship for boarding, the vessel will cease returning fire and the sabre/drop ship, can now "safely" approach the disabled vessel for the next step of the plan.
This part of the plan is usually where things tend to start going ballistic fast.
When approaching the boarding target, the pilot needs to activate the docking mode on their craft and then carefully fly into the vessel, if they don't have the docking mode engaged when they make contact with the ship, then they'll slam into the ship like a bug splattering across a windscreen.
Upon docking with the Syndicate vessel you will have to navigate closer to the hull of the syndicate vessel before you can allow your bundle of well-trained Military-grade Clowns to exit the clown vehicle.
Full Force Forward
So, you've successfully managed to get onboard a syndicate ship, well done, now what do you do?
Well, first of all you have to get into cover, the primary reason for this is because the Syndicate Navy is staffed purely by Lemmings, and as everybody knows.
Lemmings tend to be extremely suicidal, to the point where if one of the crew members, onboard the Syndicate ship, suddenly spots you then chance of the ship suddenly gaining a new hole, due to a small accident involving the natural laws of bullets and a few Thermonuclear warheads, just skyrocketed.
The secondary reason for getting into cover is due to the fact that no military vessel in space exists without a sufficient amount of point-defence to defend itself against the swarm of fighters seeking to touch it in uncomfortable areas, and these turrets, who are usually only used to destroy incoming fighter crafts, can just as happily tear your little body to shreds.
So, after keeping that information in mind, you need to find either an airlock, the hangar, a window or you can just plain old, make your own explosive entrance, any method is fine, so long as you get inside the ship.
So now that everybody has gotten inside the ship and perhaps put up a few defensive positions, you need to carefully ration out your ammo so you don't run out of it in the middle of a fight, and also make sure nobody dies.
Now if a bunch of people suddenly decides to run on ahead, don't worry because your chances of survival just increased by 2%
This is due to the fact that those who ran ahead haven't had their bloodlust sated in approximately five seconds.
Best case scenario, they'll have died somewhere taking down a few of the syndicate crew with them.
Worst case scenario, they'll have slaughtered everything onboard the ship and are now thirsting for more.

 Circuits

![]() Refered to in the code as id_mod and is the default icon for all circuit boards.
Refered to in the code as id_mod and is the default icon for all circuit boards.
![]() Default icon for all electronics if they aren't set to have their own icon.
Default icon for all electronics if they aren't set to have their own icon.
![]() Refered to in the code as power_mod and is the icon used for the power control module that's installed in APCs.
Refered to in the code as power_mod and is the icon used for the power control module that's installed in APCs.
![]() Refered to in the code as airalarm_electronics and is the icon used for the air alarm and Airlock Controller electronics.
Refered to in the code as airalarm_electronics and is the icon used for the air alarm and Airlock Controller electronics.
![]() Refered to in the code as mainboard and is the icon used for both firelock electronics and certain exosuit circuit boards.
Refered to in the code as mainboard and is the icon used for both firelock electronics and certain exosuit circuit boards.
![]() Refered to in the code as mcontroller and is the icon used for certain exosuit circuit boards alongside the firing electronics from old munitions.
Refered to in the code as mcontroller and is the icon used for certain exosuit circuit boards alongside the firing electronics from old munitions.
![]() Refered to in the code as std_mod and is the default icon for all AI upload modules and Exosuit boards.
Refered to in the code as std_mod and is the default icon for all AI upload modules and Exosuit boards.
![]() Refered to in the code as command and is the circuit board icon for certain machines.
Refered to in the code as command and is the circuit board icon for certain machines.
![]() Refered to in the code as generic and is the circuit board icon for certain machines.
Refered to in the code as generic and is the circuit board icon for certain machines.
![]() Refered to in the code as security and is the circuit board icon for certain machines.
Refered to in the code as security and is the circuit board icon for certain machines.
![]() Refered to in the code as science and is the circuit board icon for certain machines.
Refered to in the code as science and is the circuit board icon for certain machines.
![]() Refered to in the code as service and is the circuit board icon for certain machines.
Refered to in the code as service and is the circuit board icon for certain machines.
![]() Refered to in the code as medical and is the circuit board icon for certain machines.
Refered to in the code as medical and is the circuit board icon for certain machines.
![]() Refered to in the code as engineering and is the circuit board icon for certain machines.
Refered to in the code as engineering and is the circuit board icon for certain machines.
![]() Refered to in the code as supply and is the circuit board icon for certain machines.
Refered to in the code as supply and is the circuit board icon for certain machines.
 Circuit Imprinter

- The Circuit Imprinter requires glass and occasionally gold or diamond. Here you will find circuits for most of the station's machinery and robotics' exosuits. With gold and diamonds, you can also make AI law modules.
- Information on how to construct machines is available at the Guide to advanced construction.
Engineering Department Circuit Imprinter
| Icon | Item | Required Tech | Starting Tech? | Category | |||||||||||||
|---|---|---|---|---|---|---|---|---|---|---|---|---|---|---|---|---|---|
| Network Card | Computer Hardware | No | Computer Parts | 250 | 100 | 100 | |||||||||||
| Advanced Network Card | Computer Hardware | No | Computer Parts | 500 | 200 | 200 | |||||||||||
| Wired Network Card | Computer Hardware | No | Computer Parts | 2500 | 400 | 400 | |||||||||||
| Data Disk | Computer Hardware | No | Computer Parts | 800 | 200 | ||||||||||||
| Advanced Data Disk | Computer Hardware | No | Computer Parts | 1600 | 300 | ||||||||||||
| Super Data Disk | Computer Hardware | No | Computer Parts | 3200 | 400 | ||||||||||||
| Processor Board | Computer Hardware | No | Computer Parts | 200 | 1600 | ||||||||||||
| Microprocessor | Computer Hardware | No | Computer Parts | 100 | 800 | ||||||||||||
| Photonic Processor Board | Computer Hardware | No | Computer Parts | 6400 | 800 | 2000 | |||||||||||
| Photonic Microprocessor | Computer Hardware | No | Computer Parts | 3200 | 400 | 1000 | |||||||||||
| Computer Design (Battle Arcade Machine) | Arcade Games | No | Computer Boards | 1000 | 300 | ||||||||||||
| Computer Design (Mediborg's Amputation Adventure) | Illegal Technology | No | Computer Boards | 1000 | 300 | ||||||||||||
| Machine Design (PACMAN-type Generator Board) | Industrial Engineering | No | Engineering Machinery | 1000 | 300 | ||||||||||||
| Machine Design (SUPERPACMAN-type Generator Board) | Advanced Power Manipulation | No | Engineering Machinery | 1000 | 300 | ||||||||||||
| Machine Design (MRSPACMAN-type Generator Board) | Advanced Power Manipulation | No | Engineering Machinery | 1000 | 300 |
Science Department Circuit Imprinter
| Icon | Item | Required Tech | Starting Tech? | Category | |||||||||||||
|---|---|---|---|---|---|---|---|---|---|---|---|---|---|---|---|---|---|
| Module Design (Safeguard) | Artificial Intelligence | No | Ai Modules | 1000 | 300 | 2000 | |||||||||||
| Module Design (OneHuman) | Artificial Intelligence | No | Ai Modules | 1000 | 300 | 6000 | |||||||||||
| Module Design (ProtectStation) | Artificial Intelligence | No | Ai Modules | 1000 | 300 | 2000 | |||||||||||
| Module Design (Quarantine) | Artificial Intelligence | No | Ai Modules | 1000 | 300 | 2000 | |||||||||||
| Module Design (OxygenIsToxicToHumans) | Artificial Intelligence | No | Ai Modules | 1000 | 300 | 2000 | |||||||||||
| Module Design (Freeform) | Artificial Intelligence | No | Ai Modules | 1000 | 300 | 10000 | |||||||||||
| Module Design (Reset) | Artificial Intelligence | No | Ai Modules | 1000 | 300 | 2000 | |||||||||||
| Module Design (Purge) | Artificial Intelligence | No | Ai Modules | 1000 | 300 | 2000 | |||||||||||
| Module Design (Law Removal) | Artificial Intelligence | No | Ai Modules | 1000 | 300 | 2000 | |||||||||||
| Module Design (Freeform) | Artificial Intelligence | No | Ai Modules | 1000 | 300 | 10000 | |||||||||||
| Core Module Design (Asimov) | Artificial Intelligence | No | Ai Modules | 1000 | 300 | 2000 | |||||||||||
| Core Module Design (P.A.L.A.D.I.N.) | Artificial Intelligence | No | Ai Modules | 1000 | 300 | 2000 | |||||||||||
| Core Module Design (T.Y.R.A.N.T.) | Artificial Intelligence | No | Ai Modules | 1000 | 300 | 2000 | |||||||||||
| Core Module Design (Overlord) | Artificial Intelligence | No | Ai Modules | 1000 | 300 | 2000 | |||||||||||
| Core Module Design (Corporate) | Artificial Intelligence | No | Ai Modules | 1000 | 300 | 2000 | |||||||||||
| Core Module Design (Default) | Artificial Intelligence | No | Ai Modules | 1000 | 300 | 2000 | |||||||||||
| Core Module Design (Dadbot) | Artificial Intelligence | No | Ai Modules | 1000 | 300 | 2000 | |||||||||||
| Network Card | Computer Hardware | No | Computer Parts | 250 | 100 | 100 | |||||||||||
| Advanced Network Card | Computer Hardware | No | Computer Parts | 500 | 200 | 200 | |||||||||||
| Wired Network Card | Computer Hardware | No | Computer Parts | 2500 | 400 | 400 | |||||||||||
| Data Disk | Computer Hardware | No | Computer Parts | 800 | 200 | ||||||||||||
| Advanced Data Disk | Computer Hardware | No | Computer Parts | 1600 | 300 | ||||||||||||
| Super Data Disk | Computer Hardware | No | Computer Parts | 3200 | 400 | ||||||||||||
| Processor Board | Computer Hardware | No | Computer Parts | 200 | 1600 | ||||||||||||
| Microprocessor | Computer Hardware | No | Computer Parts | 100 | 800 | ||||||||||||
| Photonic Processor Board | Computer Hardware | No | Computer Parts | 6400 | 800 | 2000 | |||||||||||
| Photonic Microprocessor | Computer Hardware | No | Computer Parts | 3200 | 400 | 1000 | |||||||||||
| Computer Design (Battle Arcade Machine) | Arcade Games | No | Computer Boards | 1000 | 300 | ||||||||||||
| Computer Design (Mediborg's Amputation Adventure) | Illegal Technology | No | Computer Boards | 1000 | 300 |
Security Department Circuit Imprinter
| Icon | Item | Required Tech | Starting Tech? | Category | |||||||||||||
|---|---|---|---|---|---|---|---|---|---|---|---|---|---|---|---|---|---|
| Computer Design (Battle Arcade Machine) | Arcade Games | No | Computer Boards | 1000 | 300 | ||||||||||||
| Computer Design (Mediborg's Amputation Adventure) | Illegal Technology | No | Computer Boards | 1000 | 300 |
Medical Department Circuit Imprinter
| Icon | Item | Required Tech | Starting Tech? | Category | |||||||||||||
|---|---|---|---|---|---|---|---|---|---|---|---|---|---|---|---|---|---|
| Computer Design (Battle Arcade Machine) | Arcade Games | No | Computer Boards | 1000 | 300 | ||||||||||||
| Computer Design (Mediborg's Amputation Adventure) | Illegal Technology | No | Computer Boards | 1000 | 300 |
Service Department Circuit Imprinter
| Icon | Item | Required Tech | Starting Tech? | Category | |||||||||||||
|---|---|---|---|---|---|---|---|---|---|---|---|---|---|---|---|---|---|
| Computer Design (Battle Arcade Machine) | Arcade Games | No | Computer Boards | 1000 | 300 | ||||||||||||
| Computer Design (Mediborg's Amputation Adventure) | Illegal Technology | No | Computer Boards | 1000 | 300 |
Cargo Department Circuit Imprinter
| Icon | Item | Required Tech | Starting Tech? | Category | |||||||||||||
|---|---|---|---|---|---|---|---|---|---|---|---|---|---|---|---|---|---|
| Computer Design (Battle Arcade Machine) | Arcade Games | No | Computer Boards | 1000 | 300 | ||||||||||||
| Computer Design (Orion Trail Arcade Machine) | Arcade Games | No | Computer Boards | 1000 | 300 | ||||||||||||
| Computer Design (Mediborg's Amputation Adventure) | Illegal Technology | No | Computer Boards | 1000 | 300 |
Munitions Department Circuit Imprinter
| Icon | Item | Required Tech | Starting Tech? | Category | |||||||||||||
|---|---|---|---|---|---|---|---|---|---|---|---|---|---|---|---|---|---|
| Missile Autowrencher | Automated Missile Construction | No | Advanced Munitions | 10000 | 2500 | 2500 | 10000 | ||||||||||
| Missile Autowelder | Automated Missile Construction | No | Advanced Munitions | 10000 | 2500 | 2500 | 10000 | ||||||||||
| Missile Autoscrewer | Automated Missile Construction | No | Advanced Munitions | 10000 | 2500 | 2500 | 10000 | ||||||||||
| Missile Autowirer | Automated Missile Construction | No | Advanced Munitions | 10000 | 2500 | 2500 | 10000 | ||||||||||
| Missile Assembler | Automated Missile Construction | No | Advanced Munitions | 10000 | 2500 | 2500 | 10000 | ||||||||||
| Computer Design (Battle Arcade Machine) | Arcade Games | No | Computer Boards | 1000 | 300 | ||||||||||||
| Computer Design (Orion Trail Arcade Machine) | Arcade Games | No | Computer Boards | 1000 | 300 | ||||||||||||
| Computer Design (Mediborg's Amputation Adventure) | Illegal Technology | No | Computer Boards | 1000 | 300 |
 Techfab

- The departmental Techfabs are circuit imprinters and departmental protolathes combined, except their available circuit boards differ depending on their department.
- These lists will only consist of items that can ONLY be found in a Technology Fabricator
Engineering Department Techfab
| Icon | Item | Required Tech | Starting Tech? | Category |
|---|
Science Department Techfab
| Icon | Item | Required Tech | Starting Tech? | Category |
|---|
Security Department Techfab
| Icon | Item | Required Tech | Starting Tech? | Category |
|---|
Medical Department Techfab
| Icon | Item | Required Tech | Starting Tech? | Category |
|---|
Service Department Techfab
| Icon | Item | Required Tech | Starting Tech? | Category |
|---|
Cargo Department Techfab
| Icon | Item | Required Tech | Starting Tech? | Category | |||||||||||||
|---|---|---|---|---|---|---|---|---|---|---|---|---|---|---|---|---|---|
| Computer Design (Express Supply Console) | Mining Technology | No | Mining Designs | 1000 |
Munitions Department Techfab
| Icon | Item | Required Tech | Starting Tech? | Category |
|---|
To-Do List
Xenoecology Entry
Written by Elise Garnier
Overview
Plasmamen (or phoronized humanoids) are the newest species to ever come about naturally so to speak. By all technicality and definition, Plasmamen’s home planet is surprisingly the Earth’s moon. Through long term exposure to phoron, humanoids of all kinds have found themselves slowly but surely mutating and adapting to not only resist the harmful effects of phoron but even live and thrive off of it. Such a process shouldn’t be happening over the course of only a single lifetime, in fact it just about defies any natural process of evolution and mutation known to the current understanding of biology.
General exposure to phoron leads to tissue and liver damage. It acts as a toxic material in any organic lifeform’s body and can easily kill an individual in low quantities. However, a currently unknown quality that some humanoids share causes some form of chain reaction, dubbed “Phoronisation”, amidst their biological process that turns them into what is now called a Plasmaman. Phoronisation is only triggered by prolonged exposure to phoron over the course of years, if not decades, and in extremely small quantities due to its highly volatile and poisonous nature. This causes the skin, muscle, sinew, tendons, and internal organs to break down and reform into an incredibly hot organo-phoron compound that then covers the entirety of the skeleton, which, surprisingly, remains intact. This hot “organic” plasma fits all the criteria to be considered a living organism, complete with sentience and self awareness.
Plasmamen breathe pure gaseous phoron, which serves as the main driving force behind their biological functions. As such Plasmamen do not need to consume food to sustain themselves. Although many have shown a propensity toward vegetables over fruit when given the opportunity to eat. Such an incredibly volatile organism has been proven without a doubt to be completely immune to diseases and unbothered by radiation exposure. Their body produces enough heat to sustain themselves in the complete absence of warmth. Plasmamen are unable to reproduce on their own or with one another and rely entirely on other humanoids undergoing the chain reaction to sustain their numbers. As agonizing of a process it is to become a Plasmaman, such a great sacrifice of suffering is rewarded with the only form of naturally occurring genetic immortality in sapient beings observed so far. Plasmamen do not age and are not affected by disease.
When Plasmamen were first discovered decades ago during the expansion, humanoid-kind wasn’t sure what to make of them. They did their best to accommodate these new people and be mindful of more showing up in the future. Plasmamen were not widely received with open arms but were certainly seen as useful by Nanotrasen as the perfect employees to harvest the phoron shard in the moon during the Great Expansion.
In the furthest reaches of colonized space, humanoids were found drifting amidst the stars that very much resembled the Plasmamen of Earth’s moon. Their integration into society was relatively smooth, having flocked to the phoron shard not many questions were asked. Although prying minds had soon discovered these Plasmamen had been around for much longer than they let on. Some predated humanity as a species let alone their adventures in the endless cosmos. None of these ancient Plasmamen have been able to recollect where their home planet is nor their history leading up to their journey to Sol. Plasmamen, both ancient and new, with no memory of its origin, have since made their home with the federation working on station and ship crew alike.
Species
The Lightbulb Engineers Guide to Advanced Engineering
By: Travis Zaun
Engineering is complicated, thankless, and liable to get you blown up by your own mistakes or someone else refusing to listen. It is also rewarding, as you are the one thing keeping the ship from exploding due to those damned incompetent helmsmen and that one captain who thinks that Leeroy Jenkins is a role model instead of a cautionary tale. I'm going to give you some tips and tricks that I've learned over time to help make your life just a bit easier.
Keep in mind that this is written to the level of someone who already has a basic understanding of engineering: basic terms or concepts are not defined or explained. At the end, there is a Q&A for some commonly asked questions and some entertaining engineering stories.
On to the guide.
Chernobl Memes: Why there isn't any reactor information in this guide
There is a lack of tips to do with the reactors in this guide. It is deliberate and the reason is simple: experimentation leads to better engineers. People willing to figure out why things work with the reactors (particularly the stormdrive) generally learn a lot about engineering as they experiment. As a whole, this improves the overall quality of their engineering capabilities as they figure out gas interactions.
Piping and how it doesn't work like you think it does.
Good old Atmosia, the great state of pipes. You can do much with them, and anything fun (IE: extremely dangerous) requires a good working knowledge of how piping works if you want to live through whatever experiment you're running. Here are a few things to know about piping and Atmosia in general.
1. Pipes are indestructible as far as the forces contained within them:
You're probably already figured this out, but pipes can contain functionally infinite pressure and infinite temperature, their limits are the volume that they can contain, not the pressure or temperature within them, this is important, and I'll tell you why later.
2. Pipes don't have flow.
Yes, you read that correctly. There is no flow in pipes. Connected pipes that are not interrupted by components do not have flow, they just have volume. Pumps are just move volume from one tank to another at a certain rate. This is the equivalent of taking a cup and taking from one bucket and putting it into another bucket. All components that have a flow rate (scrubbers, non-passive vents, injectors, gas pumps, volume pumps, mixers, filters) all behave in this manner. Components that do not have a flow rate, such as valves (when open), connectors, z-level connectors, layer connectors or passive vents just connect one bucket directly to another, making it a bigger bucket.
3. What happens to one, happens to the rest.
Pipes are functionally just funny shaped tanks, and properties that happen to one section of pipe happen to ALL connected sections of pipe. This means that when that one dipshit captain panic siphons a room that was on fire, he just massively heated up the entire subber network, making it useless for actually scrubbing anything anywhere else. It also means that when you apply cooling to one section of piping, you apply cooling to the entire section of connected piping, assuming there aren't any interruptions in the line. The best way to fix that dipshit captains mistake is to build a thermomachine with the best components that you can get (or multiple thermomachines if you have low tier components), attach it to a random section on the scrubbers network, and turn it on.
4. Thermodynamics. It's a thing that exists.
Remember how I mentioned that pipes have a limit on volume, but not pressure or temperature? The importance is that when gasses expand, they take up more volume. They expand when they heat up, and contract when they cool down. Why does this matter? Well, for one part of the reason that the dipshit captain was able to disable that scrubbers network is that at the end of the scrubbers network is a pump that takes it into the main atmospheric tanks. That pump, upgraded to a volume pump or not, can only move certain amount of pressure (standard pump) or volume (volume pump) at a time. If the temperature is very hot, it will not be moving very many moles (the measure of the actual amount of gas) at all, and all the gas in it was just expanded to a massive pressure and volume, likely maxing out the amount contained within, and meaning that you're not moving it at anywhere near the normal rate. On the other side of this, you can use this concept, with a valve, to use one section of thermal piping to heat up another section on demand.
Damage Control: Rise of the Fixman
So, the ship has taken a few hits, the clown is dead, munitions is complaining about their compartment being depressurized again, medical has ceased to exist as a location, you've lost contact with the bridge, and you've just barely managed to stop the ship from exploding due to superstructure critical. What do you do, and how do you do it?
1. Triage, not just for medical.
So, you've got a whole list of issues. Priorities change in combat and out of combat, and what you can afford to fix changes with the number of engineers you have available to you. These priorities are debatable, but I'll list what I treat as the priorities here and why. I've also added in a list of Non-Priority Fixes, otherwise known as "what's in it for me?" fixes. The things at the bottom I will only fix if someone is bribing me.
In Combat:
1. Fix the reactor-if this took a hit and/or is starting to do the funny alarming noises, fix it. You've got about 2 minutes from unhappy to boom with the AGCNR or Stormdrive.
2. Bridge-Specifically the HELM, DRADIS, TAC and FTL consoles. If they're broken, you can't move and shoot, and you'll probably die.
The Depot
Sugery Tools
![]() Scalpel:
Scalpel:
![]() Retractor:
Retractor:
![]() Hemostat:
Hemostat:
![]() Cautery:
Cautery:
![]() Circular Saw:
Circular Saw:
![]() Blood Filter:
Blood Filter:
Mechanical Surgeries
Chemical Tiers
| Chemical Name | Formula | Minimum Level | Maximum Level |
|---|---|---|---|
| Virus Food | 5 parts Water 5 parts Milk |
1 | 2 |
| Unstable Mutagen | 1 part Chlorine 1 part Phosphorus |
2 | 4 |
| Mutagenic Agar | 1 part Unstable Mutagen 1 part Chlorine 1 part Phosphorus 1 part Virus Food
5 parts Water 5 parts Milk |
3 | 3 |
| Liquid Plasma | Grind a Sheet of Plasma | 4 | 6 |
| Uranium | Grind a Sheet of Uranium | 5 | 6 |
| Sucrose Agar |
Viro
| Symptom | Stealth | Resistance | Stage speed | Transmission | Severity | Level | Required Chemical | Effect | Threshold (hover mouse over for details) |
|---|---|---|---|---|---|---|---|---|---|
| Acute Respiratory Distress Syndrome | -2 | 0 | -1 | -2 | 5 | 9 | Highly Unstable Virus Food | Causes heavy suffocation damage, while giving a small chance of heart attacks. Becomes even more lethal if the mob has more than 120 suffocation damage. Has no effect if the host does not need to breath | Stage Speed 8, Transmission 8 |
| Alopecia | 0 | 3 | 2 | 2 | 0 | 4 | Unstable Mutagen/Sucrose Agar | Causes rapid hair loss. | None |
| Cornu Cutaneum | -3 | 3 | -3 | 0 | 1 | 0 | Anomalous Virus Food | The host damages anyone next to them every so often | Resistance 6, Transmission 6 |
Oh boy
WIP Guide Links
| Picture | Recipe | Ingredients | Taste | Nutritional Value | Notes |
|---|---|---|---|---|---|

|
Grilled Cheese Sandwich | 2 (plain) bread slices + 2 Slice any bread with your knife. cheese wedges
Slice a cheese wheel with your knifeMix 40 milk + 5 universal enzyme (catalyst) |
Toast, cheese | 6 Nutriment, 1 Vitamin | Space Vegetarian, but not Space Vegan friendly. |

|
Hotdog | 1 bun + 1 Microwave a dough slice Slice a flat dough with your knifeFlatten a dough with your rolling pinMix 15u flour + 10u waterGrind wheat or oat stalks Sausage + 5 units
1 + 2 cutlets Microwave a raw cutlet Slice a Meat with your knife. |
Bun, meat | 6 Nutriment, 3 Ketchup, 3 Vitamin | Fresh footlong ready to go down on. |

|
Jelly Sandwich | 2 (plain) bread slices + 5 units Slice any bread with your knife. cherry jelly
Grind cherries |
Bread, jelly | 2 Nutriment, 5 Cherry Jelly, 2 Vitamin | You wish you had some peanut butter to go with this... |
|
|
Jelly Sandwich (slime) | 2 (plain) bread slices + 5 units Slice any bread with your knife. Slime Jelly
Grind an unused slime extract |
Bread, jelly | 2 Nutriment, 5 Slime Jelly, 2 Vitamin | Probably as toxic to the crew as peanuts would be. |

|
Not-a-Sandwich | 1 Fake Moustache + 2 (plain) bread slices
Slice any bread with your knife. |
Nothing Suspicious | 6 Nutriment, 6 Vitamin | Something seems to be wrong with this, you can't quite figure what. Maybe it's his moustache. |

|
Sandwich | 2 (plain) bread slices + 1 Slice any bread with your knife. meat steak + 1 Microwave meat cheese wedge
Slice a cheese wheel with your knifeMix 40 milk + 5 universal enzyme (catalyst) |
Meat, cheese, bread, lettuce | 7 Nutriment, 1 Vitamin | Talking to your food may result in a trip to the Chaplain. |
Operating the guns

|
No smoking!
Missiles, gunpowder bags and artillery shells blow up very easily, even from the smallest spark. Don't smoke, use welders, etc. in the weapons bay. |
As a Munitions Technician, munitions assigned squad member, or Master At Arms, your job is to supply and control the various weapons on the ship to make sure they continue firing. This includes 50 Cal. Cannons, Railguns, Artillery cannons, Torpedo tubes, Gauss turrets, and the Automated Missile System (AMS). The faster you can load and prepare these weapons, the faster they can open fire on enemy ships. Do note that not all of the weapons listed here may be on your assigned vessel, so be certain to take inventory at the beginning of a shift and prepare accordingly for each weapon's needs.

 Point Defense Cannons
Point Defense cannons (PDCs) are the lifeblood of short ranged combat
Serving as a rapid-fire weapon that is effective at taking down enemy fighters that other weapons may miss and destroying incoming missiles and torpedoes.
Luckily for you, loading these cannons is as easy as firing them:
- Go to the empty loading rack on the wall

- Insert a Full PDC Ammo Box

Artillery Cannon (Deck Gun)
The deck guns are massive cannons that, when operated correctly, can obliterate any enemy in an instant.
They fire heavy projectiles which need to be primed before loading and are fueled with gunpowder which is used to propel the ammunition.
Loading Naval Artillery goes like this:
- Acquire a projectile:

- Arm the projectile with a multitool:
 =>
=> 

- Drag it onto the Payload Loading Gate:
 =>
=> 
- Acquire the propellant of choice (either gunpowder or plasma-based accelerant):

- Load the propellant into the Powder Loading Gate:
 =>
=> 
- Go to the console and hit "Pack from loader":

- Repeat these steps many times if you want a faster shot. You will generally load 6 bags of normal gunpowder.
- Go back to the Console, and hit "Feed Shell":
- Voila! The shell is ready to fire. After the gun has fired - you will hear that anywhere on the ship - repeat these steps
It's important to note that there is no limit to how much gunpowder can be loaded at one time, meaning you can insert only 1 or even 20 bags of powder. Most of the time you'll want to put in a fair amount (about 5 bags or more) of powder as the cannon round travels very slowly without it, but it's best to get in contact with the ship's tactical systems operator (one of the bridge staff) about this if possible. If you let them know how much powder you're going to load they'll be able to maximize damage output.
To see how much power is behind each shot, look on the console. It will tell you how much propellant is packed in, in units called dT. Unpacked shells start out with 25% dT, 1 bag of gunpowder adds 25% dT, and one unit of plasma-based accelerant adds 50% dT. A Hungry gunpowder bag's dT% varies greatly depending on how much it has been fed.
 Autonomous Missile System (AMS)
Control system for firing Missiles Automatically!
The automated missile system is a series of missile tubes linked up to a central computer, this allows it to fire missiles and torpedos automatically at targeted enemies, which are capable of dealing incredible damage and can home in on the enemy ships, making shots almost always guaranteed to hit. Loading the missiles is simple, requiring them to be assembled and then dragged onto the tube. Then walk over to the assigned Ordenance Computer, click "Payload Loaded" then "Payload Chambered". Don't forget to turn off safeties!
Controlling the AMS is fairly simple, as you can do it with the press of a button. Simply walk over to the AMS control console and select one of two firing modes:
Anti-ship
While using the anti-ship firing mode, the targeting system fires its missiles at enemy ships within its detection radius. It will also fire at enemy ships that have been targeted by fighters.
Countermeasure
If you select the countermeasure firing mode, the system will prioritize targeting incoming gunfire to avoid the ship getting hit. It also fires at ships within the detection radius if there's no incoming projectiles.
64px Torpedo Tubes
Torpedo tubes are the slower, bulkier counterparts of VLS tubes.
Torpedo tubes are slow loading, require maintenance, but are capable of dealing incredible damage and can home in on the enemy ships, making shots almost always guaranteed to hit. They have mostly been replaced by VLS tubes, given their easier maintenance and automation. However, you may still see them on some ships.
To load a torpedo tube, acquire a pre-made torpedo by dragging one onto a trolley (trolleys have a capacity of 5 torpedos) and bringing it over to the tube. Click on the trolley, click a torpedo to detach it, then drag and drop the torpedo into the tube to begin loading it. Afterward, use the adjacent console and press "Load tray", "Chamber Tray Payload", and finally "Disengage safeties" to finish loading the Torpedo tube. Remember to re-engage the Torpedo tube safeties whenever reloading to prevent damage
Maintenance
Torpedo tubes require maintenance when they're used too much. You probably want to perform maintenance between each bout of combat.
Note: make sure there's nothing in the weapon and that the safeties are on, to prevent unnecessary explosions.
- Unscrew the maintenance hatch on the primary external casing
- Unbolt (wrench) the internal maintenance panel
- Apply 10 units of Oil to the exposed internal machinery, repeat as needed
- Bolt (wrench) the panel, then fix (screwdriver) the hatch back in place
Gauss Guns
Gauss guns fire 300mm Teflon coated tungsten rounds.
Unlike other ship weaponry, these are not controlled by Bridge Staff using the tactical console and are typically manned by Munitions Technicians. Gauss guns require no maintenance.
To man gauss guns, buckle yourself into the gauss gunner chair and you'll rise into the cockpit above. To fire, click on the overmap to fire a powerful short-range burst. Gauss guns eat through ammo quickly, and you'll ideally want someone below deck keeping you loaded at all times. Loading tungsten rounds is as simple as placing them in a crate, click-dragging it to the loading rack, and sending it up for reloading. Additional slugs can be acquired from a nearby Gauss ammunition dispenser that can be upgraded by science to produce slugs at a faster rate.
 Superliminal Bluespace Artillery
Big Honking Space Gun, capable of not just annihilating your hearing, but also the enemy ship!
The Superliminal BSA is a massive machine which can accelerate a bolt of concentrated quark-gluon plasma to superliminal speeds, tearing clean through targets and annihilating everything in its path. It was developed from Bluespace Artillery cannons acquired in questionably legal way.
Operating it is simple, maintaining it is harder. It requires a massive amount of power just to fire even once. To input this power, simply go to it's console, set a desired amount of incoming power, and enamble charging.
Ensure that it has a clear firing path to space.
Flak cannons
Flak cannons fire a large amount of proximity-detonated ammunition at incoming torpedos and missiles.
They excel at defending against these forms of weaponry, but they have very limited range.
Operating them is simple:
- Go to the empty loading rack on the wall
- Insert a Full Flak Ammo Box

SN 'Sucker Punch' Broadside Cannon
The Starship Equivalent of a shotgun
The Broadside Cannon is a weapon that requires the ship to have its side facing the enemy vessel before you fire it, otherwise the weapon will miss the target entirely.
The Broadside Cannon requires a secondary machine known as the Broadside Shell Packer Bench in order to produce the ammo for it. ![]()
Loading the Broadside Cannon is relatively simple process:
- Acquire Five Broadside Shell Casing:

- Insert the Casings into the Broadside Shell Packer Bench:
 =>
=> 
- Acquire Five Broadside Shell Loads:

- Insert the Loads into the Broadside Shell Packer Bench: =>

- Acquire the propellant of choice (either gunpowder or plasma-based accelerant):
- Insert your propellant of choice into the Broadside Shell Packer Bench: =>

- Interact with the Broadside Shell Packer Bench and hit "Pack Casings"
- Load the produced Broadside Shells into the Broadside Cannon:

- Voila! The Broadside Cannon is now ready to fire. After the cannon has fired repeat these steps if you have run out of ammo, otherwise repeat step 8
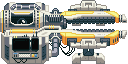 Magnetic Phoron Acceleration Caster
Moth Plasma Gun, for Ship destruction!
|
|
This section contains Test Merged Information
This section is referencing a Test Merge. |
The phoron caster is a high maintenance weapon that requires a lot of attention to be fired and a lot of attention after it's fired.
The steps for firing are as follows:
- Locate a plasma gas canister and fasten it to the nearby connector:

- Turn on the gas regulator, this will begin to fill up the Plasma Capacitor Charge on the weapon's UI.

- Once the Capacitor Charge is at 100%, turn off the gas regulator.
- Take a phoron core and insert it into the main weapon itself

- On the weapon's UI, click the "Condense Phoron Mass button"
- On the weapon's UI, click the "Commence Magnetic Charge"
- On the weapon's UI, click the "Release Constrictor Field button". This button acts as a safety and will constantly lower the Field Integrity.
- Use the TAC Console on the bridge to fire the weapon.

Warnings:
- Every time the weapon is fired or misfires, the weapon's Alignment will degrade.
- If the weapon's alignment is less than 90%, is has a greater chance of misfiring.
- The weapon will not fire if the gas regulator is on or if the splines aren't fully restored.
- When the weapon is fired, the Splines will automatically go to 0%. This will replenish over time.
- Do not try to disassemble this weapon, you will regret it.
- The gas regulator will only take plasma gas, and no other gas.
- If the weapon's splines or field integrity stop restoring for any reason, toggle the constrictor field off and on again.
- This weapon will blind you if you're not wearing eye protection while in its presence.
- This weapon cannot target fighters or other small ships.
 Burst Phaser MK2

A coaxial laser system, capable of firing controlled laser bursts at a target.
These energy weapons are fired in the direction the ship is currently facing, and is fired by the Ship Pilot, as such you need to point the nose of the ship directly at the enemy in order to have a guaranteed chance of hitting it.
Due to being an energy weapon these guns primarily do not require a constant dedication of attention in order to maintain them, however they require a constant source of power:
- Interact with the Burst Phaser Weapon
- Toggle the Slider to the amount of power you wish to pump into the cannon, this affects how fast it recharges and how many shots it can fire before needing to recharge.
- Press the "Enable Charging" button and, assuming you have enough power in the grid, the gun will charge up and be ready to fire.
 Phase Cannon

An extremely powerful directed energy weapon which is capable of delivering a devastating beam attack.
This energy weapon behaves similarly to the Deck Guns in terms of aiming, meaning you can be performing a valiant tactical advance in the opposite direction of the enemy and still have a vague chance to hit the target.
Due to being an energy weapon these guns primarily do not require a constant dedication of attention in order to maintain them, however they require a constant source of power:
- Interact with the Phase Cannon
- Toggle the Slider to the amount of power you wish to pump into the cannon, this affects how fast it recharges and how many shots it can fire before needing to recharge.
- Press the "Enable Charging" button and, assuming you have enough power in the grid, the gun will charge up and be ready to fire.
 Laser Anti Missile System

The Energy Weapon equivalent of a modified Autonomous Missile System
Primarily designed to shoot down missiles using lasers rather than firing missiles at missiles and hoping it will work itself out, could probably be used for other shenanigans, such as boiling eggs
Due to being an energy weapon these guns primarily do not require a constant dedication of attention in order to maintain them, however they require a constant source of power:
- Interact with the Laser Anti Missile System
- Toggle the Slider to the amount of power you wish to pump into the cannon, this affects how fast it recharges and how many shots it can fire before needing to recharge.
- Press the "Enable Charging" button and, assuming you have enough power in the grid, the gun will charge up and be ready to fire.
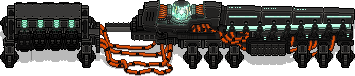
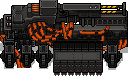 NT-ST049 'Sturm' coaxial railgun

A hybrid Railgun Weapon, capable of switching between firing Railgun Slugs and Deck Gun Shells.
The Coaxial Railgun is a weapon that uses both Power and Physical Ammunition to fire a range of projectiles at the enemy vessels, however due to its mechanical parts, the thing requires maintenance from time to time.
The Coaxial Railgun, much like all railguns, uses electricity to produce a magnetic field in order to rapidly accelerate their ammunition, it is due to this reason that you need to keep an eye on the magnetic alignment of the field.
If the field degrades too much it will affect the projectile velocity and increase the chances of a misfiring incident occurring.
The weapon is capable of being switching configuration between firing Railgun Slugs and Deck Gun Shells pretty easily.
Operating the Railgun is a relatively easy thing to do:
- Interact with the weapon to bring up its UI.
- Drag the Power Allocation slider to the users desired allocation of power. Please note that this will result in a passive drain on the vessels power supply, so do not do this until the engine is setup and working properly.
- Switch Configuration "I4- Configuration:" to the Ammunition of Choice, options being Railgun Slugs and Deck Gun Shells:

- Insert the ammunition you have chosen, if it's Railgun slugs then insert 5 Railgun Slugs into the Weapon, otherwise insert 1 Deck Gun Shell that has been armed:
- Interact with the weapon again to bring up its UI and press the button labeled "I1 - Payload loaded"
- Press the button labeled "I2 - Payload chambered"
- Press the button labeled "I3 - Weapon safeties" to turn off the safeties and prime the Weapon for firing.
Maintenance
The Coaxial Railgun requires maintenance when its used too much and when the Magnetic Alignment is out of align. You probably want to perform maintenance between each bout of combat.
Note: make sure there's nothing in the weapon and that the safeties are on.
In order to restore the Magnetic Alignment do the following:
- Unscrew the maintenance hatch on the primary external casing
- Unbolt (wrench) the internal maintenance panel
- Restore the Alignment using a Multitool
- Bolt (wrench) the panel.
- Screw the maintenance hatch back into place.
In order to repair the Gun Condition do the following:
- Unscrew the maintenance hatch on the primary external casing
- Unbolt (wrench) the internal maintenance panel
- Apply 10 units of Oil to the exposed internal machinery, repeat as needed
- Bolt (wrench) the panel, then fix (screwdriver) the hatch back in place