Difference between revisions of "User:Spagooty"
| (33 intermediate revisions by the same user not shown) | |||
| Line 1: | Line 1: | ||
| − | + | Do you long for new experiences? Are you comfortable working under pressure? Do you do well when working with explosives? Like making things go boom? If so, this is the guide for you! If you follow these simple instructions you will be prepared to load and maintain all of the weapons on your assigned vessel and qualified to call yourself a professional Munitions Technician. Be wary though, much like the goalie on a professional soccer team, you're the first one to blame if things go sour in combat, second only to the command staff, but if you can't handle the heat - stay out of the munitions bay. | |
| − | + | ==Operating the guns== | |
| − | + | {{Important|Image=Warningsign.png|Title=No smoking!|Note=Missiles, gunpowder bags and artillery shells blow up very easily, even from the smallest spark. Don't smoke, use welders, etc. in the weapons bay.}} | |
| − | + | As a Munitions Technician, munitions assigned squad member, or Master At Arms, your job is to supply and control the various weapons on the ship to make sure they continue firing. This includes 50 Cal. Cannons, Railguns, Artillery cannons, Torpedo tubes, Gauss turrets, and the Automated Missile System (AMS). The faster you can load and prepare these weapons, the faster they can open fire on enemy ships. Do note that not all of the weapons listed here may be on your assigned vessel, so be certain to take inventory at the beginning of a shift and prepare accordingly for each weapon's needs.<br> | |
| − | + | <br> | |
| − | + | <div class="toccolours mw-collapsible mw-collapsed" style="width: 80%;"> | |
| − | + | === [[File:PDCrack.gif]] Point Defense Cannons === | |
| − | | | + | <span style="font-size:1.2em;">Point Defense cannons (PDCs) are the lifeblood of short ranged combat</span> |
| − | | | + | <div class="mw-collapsible-content"> |
| − | | | + | Serving as a rapid-fire weapon that is effective at taking down enemy fighters that other weapons may miss and destroying incoming missiles and torpedoes. |
| − | |||
| − | |||
| − | |||
| − | |||
| − | |||
| − | |||
| − | |||
| − | |||
| − | |||
| − | ''' | + | Luckily for you, loading these cannons is as easy as firing them: |
| + | # Go to the empty loading rack on the wall [[File:PDCEmpty.gif]] | ||
| + | # Insert a Full PDC Ammo Box [[File:PDCAmmo.png]] | ||
| + | </div></div> | ||
| + | <div class="toccolours mw-collapsible mw-collapsed" style="width: 80%;"> | ||
| + | === [[File:Deck_gun.png]] Artillery Cannon (Deck Gun) === | ||
| + | <span style="font-size:1.2em;">The deck guns are massive cannons that, when operated correctly, can obliterate any enemy in an instant.</span> | ||
| + | <div class="mw-collapsible-content"> | ||
| + | [[File:TCArtRoom.png|right|thumb|An example of an Artillery bay configuration.]] | ||
| + | They fire heavy projectiles which need to be primed before loading and are fueled with gunpowder which is used to propel the ammunition.<br> | ||
| + | Loading Naval Artillery goes like this: | ||
| + | # Acquire a projectile: [[File:NACShells.gif]] | ||
| + | # Arm the projectile with a multitool:[[File:Multitool.gif]] '''=>''' [[File:NAC_Shell_Armed.gif]] [[File:NAC_AP_Shell_Armed.gif]] | ||
| + | # Drag it onto the Payload Loading Gate: [[File:NAC_Payload_Gate.png]] '''=>''' [[File:NAC_Payload_Gate_Loaded.png]] | ||
| + | # Acquire the propellant of choice (either gunpowder or plasma-based accelerant): [[File:NAC_Propellant.gif]] | ||
| + | # Load the propellant into the Powder Loading Gate: [[File:NAC_Powder_Gate.png]] '''=>''' [[File:NAC_Powder_Gate_Loaded.png]] | ||
| + | # Go to the console and hit "Pack from loader": [[File:NAC_Controls.png]] | ||
| + | # Repeat these steps many times if you want a faster shot. You will generally load 6 bags of normal gunpowder. | ||
| + | # Go back to the Console, and hit "Feed Shell": [[File:NAC_Controls.png]] | ||
| + | # Voila! The shell is ready to fire. After the gun has fired - you will hear that anywhere on the ship - repeat these steps | ||
| + | It's important to note that '''there is no limit to how much gunpowder can be loaded at one time''', meaning you can insert only 1 or even 20 bags of powder. Most of the time you'll want to put in a fair amount (about 5 bags or more) of powder as the cannon round travels very slowly without it, but it's best to get in contact with the ship's tactical systems operator (one of the bridge staff) about this if possible. If you let them know how much powder you're going to load they'll be able to maximize damage output. | ||
| − | == | + | To see how much power is behind each shot, look on the console. It will tell you how much propellant is packed in, in units called dT. Unpacked shells start out with 25% dT, 1 bag of gunpowder adds 25% dT, and one unit of plasma-based accelerant adds 50% dT. A [[Hungry Gunpowder Bag|Hungry gunpowder bag]]'s dT% varies greatly depending on how much it has been fed. |
| − | [[File: | + | </div></div> |
| − | + | <div class="toccolours mw-collapsible mw-collapsed" style="width: 80%;"> | |
| + | === [[File:AMSComp.gif]] Autonomous Missile System (AMS) === | ||
| + | <span style="font-size:1.2em;">Control system for firing Missiles Automatically!</span> | ||
| + | <div class="mw-collapsible-content"> | ||
| + | The automated missile system is a series of missile tubes linked up to a central computer, this allows it to fire missiles and torpedos automatically at targeted enemies, which are capable of dealing incredible damage and can home in on the enemy ships, making shots almost always guaranteed to hit. Loading the missiles is simple, requiring them to be assembled and then dragged onto the tube. Then walk over to the assigned Ordenance Computer, click "Payload Loaded" then "Payload Chambered". Don't forget to turn off safeties! | ||
| − | + | Controlling the AMS is fairly simple, as you can do it with the press of a button. Simply walk over to the AMS control console and select one of two firing modes: | |
| − | + | ==== Anti-ship ==== | |
| − | + | While using the anti-ship firing mode, the targeting system fires its missiles at enemy ships within its detection radius. It will also fire at enemy ships that have been targeted by fighters. | |
| − | + | ==== Countermeasure ==== | |
| − | + | If you select the countermeasure firing mode, the system will prioritize targeting incoming gunfire to avoid the ship getting hit. It also fires at ships within the detection radius if there's no incoming projectiles. | |
| + | </div></div> | ||
| + | <div class="toccolours mw-collapsible mw-collapsed" style="width: 80%;"> | ||
| + | === [[File:NewTorpTube.png|64px]] Torpedo Tubes === | ||
| + | <span style="font-size:1.2em;">Torpedo tubes are the slower, bulkier counterparts of VLS tubes.</span> | ||
| + | <div class="mw-collapsible-content"> | ||
| + | Torpedo tubes are slow loading, require maintenance, but are capable of dealing incredible damage and can home in on the enemy ships, making shots almost always guaranteed to hit. They have mostly been replaced by VLS tubes, given their easier maintenance and automation. However, you may still see them on some ships. | ||
| − | + | To load a torpedo tube, acquire a pre-made torpedo by dragging one onto a trolley (trolleys have a capacity of 5 torpedos) and bringing it over to the tube. Click on the trolley, click a torpedo to detach it, then drag and drop the torpedo into the tube to begin loading it. Afterward, use the adjacent console and press "Load tray", "Chamber Tray Payload", and finally "Disengage safeties" to finish loading the Torpedo tube. Remember to re-engage the Torpedo tube safeties whenever reloading to prevent damage | |
| + | ====Maintenance==== | ||
| + | Torpedo tubes require maintenance when they're used too much. You probably want to perform maintenance between each bout of combat.<br> | ||
| + | Note: Make sure there's nothing in the weapon and that the safeties are on, to prevent unnecessary explosions. | ||
| + | # Unscrew the maintenance hatch on the primary external casing | ||
| + | # Unbolt (wrench) the internal maintenance panel | ||
| + | # Apply 10 units of Oil to the exposed internal machinery, repeat as needed | ||
| + | # Bolt (wrench) the panel, then fix (screwdriver) the hatch back in place | ||
| + | </div></div> | ||
| + | <div class="toccolours mw-collapsible mw-collapsed" style="width: 80%;"> | ||
| + | === [[File:GaussGun.png|64px]] Gauss Guns=== | ||
| + | <span style="font-size:1.2em;">Gauss guns fire 300mm Teflon coated tungsten rounds.</span> | ||
| + | <div class="mw-collapsible-content"> | ||
| + | Unlike other ship weaponry, these are not controlled by [[Bridge Staff]] using the tactical console and are typically manned by Munitions Technicians. Gauss guns require no maintenance. | ||
| − | + | To man gauss guns, buckle yourself into the gauss gunner chair and you'll rise into the cockpit above. To fire, click on the overmap to fire a powerful short-range burst. Gauss guns eat through ammo quickly, and you'll ideally want someone below deck keeping you loaded at all times. Loading tungsten rounds is as simple as placing them in a crate, click-dragging it to the loading rack, and sending it up for reloading. Additional slugs can be acquired from a nearby Gauss ammunition dispenser that can be upgraded by science to produce slugs at a faster rate. | |
| − | |||
| − | === | + | Gauss ammo racks can be upgraded by researching Guided Munitions, then printing the respective circuit board and applying it to the rack. Upgrading a gauss rack allows for rounds to be bump-loaded, meaning conveyor belts can be laid from gauss ammo dispensers directly to upgraded racks. |
| − | + | </div></div> | |
| + | <div class="toccolours mw-collapsible mw-collapsed" style="width: 80%;"> | ||
| + | === [[File:Ship_BSA.png|96px]] Superliminal Bluespace Artillery === | ||
| + | <span style="font-size:1.2em;">Big Honking Space Gun, capable of not just annihilating your hearing, but also the enemy ship!</span> | ||
| + | <div class="mw-collapsible-content"> | ||
| + | The Superliminal BSA is a massive machine which can accelerate a bolt of concentrated quark-gluon plasma to superliminal speeds, tearing clean through targets and annihilating everything in its path. It was developed from [[Station Goals|Bluespace Artillery]] cannons acquired in questionably legal way. | ||
| − | + | Operating it is simple, maintaining it is harder. It requires a massive amount of power just to fire even once. To input this power, simply go to it's console, set a desired amount of incoming power, and enamble charging. | |
| − | |||
| − | |||
| − | |||
| − | |||
| − | |||
| − | |||
| − | |||
| − | == | + | '''Ensure that it has a clear firing path to space.''' |
| − | [[File: | + | </div></div> |
| − | + | <div class="toccolours mw-collapsible mw-collapsed" style="width: 80%;"> | |
| − | + | === [[File:PDCrack.gif]] Flak cannons === | |
| + | <span style="font-size:1.2em;">Flak cannons fire a large amount of proximity-detonated ammunition at incoming torpedos and missiles.</span> | ||
| + | <div class="mw-collapsible-content"> | ||
| + | They excel at defending against these forms of weaponry, but they have very limited range. | ||
| − | + | Operating them is simple: | |
| − | + | # Go to the empty loading rack on the wall [[File:PDCEmpty.gif]] | |
| − | + | # Insert a Full Flak Ammo Box [[File:FlakAmmo.png]] | |
| − | + | </div></div> | |
| − | + | <div class="toccolours mw-collapsible mw-collapsed" style="width: 80%;"> | |
| + | === [[File:coaxial_railgun.png|96px]] NT-ST049 'Sturm' coaxial railgun === | ||
| + | <span style="font-size:1.2em;">A hybrid Railgun Weapon, capable of switching between firing Railgun Slugs and Deck Gun Shells.</span> | ||
| + | <div class="mw-collapsible-content"> | ||
| + | The Coaxial Railgun is a weapon that uses both Power and Physical Ammunition to fire a range of projectiles at the enemy vessels, however due to its mechanical parts, the thing requires maintenance from time to time. | ||
| − | + | The Coaxial Railgun, much like all railguns, uses electricity to produce a magnetic field in order to rapidly accelerate their ammunition, it is due to this reason that you need to keep an eye on the magnetic alignment of the field. | |
| − | + | If the field degrades too much it will affect the projectile velocity and increase the chances of a misfiring incident occurring. | |
| − | |||
| − | + | The weapon is capable of being switching configuration between firing Railgun Slugs and Deck Gun Shells pretty easily. | |
| − | |||
| − | |||
| − | |||
| − | |||
| − | + | Operating the Railgun is a relatively easy thing to do: | |
| + | # Interact with the weapon to bring up its UI. | ||
| + | # Drag the Power Allocation slider to the users desired allocation of power. '''Please note that this will result in a passive drain on the vessels power supply, so do not do this until the engine is setup and working properly.''' | ||
| + | # Switch Configuration "I4- Configuration:" to the Ammunition of Choice, options being Railgun Slugs and Deck Gun Shells: [[File:Railgun_ammo.png]] [[File:NACShells.gif]] | ||
| + | # Insert the ammunition you have chosen, if it's Railgun slugs then insert 5 Railgun Slugs into the Weapon, otherwise insert 1 Deck Gun Shell that has been armed: [[File:Railgun_ammo.png]] [[File:NACShells.gif]] | ||
| + | # Interact with the weapon again to bring up its UI and press the button labeled "I1 - Payload loaded" | ||
| + | # Press the button labeled "I2 - Payload chambered" | ||
| + | # Press the button labeled "I3 - Weapon safeties" to turn off the safeties and prime the Weapon for firing. | ||
| + | ====Maintenance==== | ||
| + | The Coaxial Railgun requires maintenance when its used too much and when the Magnetic Alignment is out of align. You probably want to perform maintenance between each bout of combat.<br> | ||
| + | Note: Make sure there's nothing in the weapon and that the safeties are on. | ||
| − | == | + | In order to restore the Magnetic Alignment do the following: |
| − | [[File: | + | # Unscrew the maintenance hatch on the primary external casing |
| − | + | # Unbolt (wrench) the internal maintenance panel | |
| + | # Restore the Alignment using a Multitool | ||
| + | # Bolt (wrench) the panel. | ||
| + | # Screw the maintenance hatch back into place. | ||
| + | In order to repair the Gun Condition do the following: | ||
| + | # Unscrew the maintenance hatch on the primary external casing | ||
| + | # Unbolt (wrench) the internal maintenance panel | ||
| + | # Apply 10 units of Oil to the exposed internal machinery, repeat as needed | ||
| + | # Bolt (wrench) the panel, then fix (screwdriver) the hatch back in place | ||
| + | </div></div> | ||
| + | <div class="toccolours mw-collapsible mw-collapsed" style="width: 80%;"> | ||
| + | === [[File:Broadsides.png|96px]] SN 'Sucker Punch' Broadside Cannon === | ||
| + | <span style="font-size:1.2em;">The Starship Equivalent of a shotgun</span> | ||
| + | <div class="mw-collapsible-content"> | ||
| + | The Broadside Cannon is a weapon that requires the ship to have its side facing the enemy vessel before you fire it, otherwise the weapon will miss the target entirely. | ||
| − | + | The Broadside Cannon requires a secondary machine known as the Broadside Shell Packer Bench in order to produce the ammo for it. [[File:PackingBench.png]] | |
| − | |||
| − | |||
| − | + | Loading the Broadside Cannon is relatively simple process: | |
| − | The | + | # Acquire Five Broadside Shell Casing: [[File:Broadside_casing.png]] |
| + | # Insert the Casings into the Broadside Shell Packer Bench: [[File:PackingBench.png]] '''=>''' [[File:PackingBench_casings.png]] | ||
| + | # Acquire Five Broadside Shell Loads: [[File:Broadside_load.png]] | ||
| + | # Insert the Loads into the Broadside Shell Packer Bench: [[File:PackingBench_casings.png]] '''=>''' [[File:PackingBench_loads.png]] | ||
| + | # Acquire the propellant of choice (either gunpowder or plasma-based accelerant): [[File:NAC_Propellant.gif]] | ||
| + | # Insert your propellant of choice into the Broadside Shell Packer Bench: [[File:PackingBench_loads.png]] '''=>''' [[File:PackingBench_full.png]] | ||
| + | # Interact with the Broadside Shell Packer Bench and hit "Pack Casings" [[File:PackingBench.png]] | ||
| + | # Load the produced Broadside Shells into the Broadside Cannon: [[File:Broadside_shells.gif]] | ||
| + | # Voila! The Broadside Cannon is now ready to fire. After the cannon has fired repeat these steps if you have run out of ammo, otherwise repeat step 8 | ||
| + | </div></div> | ||
| + | <div class="toccolours mw-collapsible mw-collapsed" style="width: 80%;"> | ||
| + | === [[File:PlasmaCaster.png|96px]] Magnetic Phoron Acceleration Caster === | ||
| + | <span style="font-size:1.2em;">Moth Plasma Gun, for Ship destruction!</span> | ||
| + | <div class="mw-collapsible-content"> | ||
| + | The phoron caster is a high maintenance weapon that requires a lot of attention to be fired and a lot of attention after it's fired. | ||
| − | + | The steps for firing are as follows: | |
| − | ''' | + | # Locate a plasma gas canister and fasten it to the nearby connector: [[File:Plasma_Canister.png]] |
| − | [[File: | + | # Turn on the gas regulator, this will begin to fill up the Plasma Capacitor Charge on the weapon's UI. [[File:Plasma_Regulator.png]] |
| + | # Once the Capacitor Charge is at 100%, turn off the gas regulator. [[File:Plasma_Regulator.png]] | ||
| + | # Take a phoron core and insert it into the main weapon itself [[File:Plasma_Core.png]] | ||
| + | # On the weapon's UI, click the "Condense Phoron Mass button" | ||
| + | # On the weapon's UI, click the "Commence Magnetic Charge" | ||
| + | # On the weapon's UI, click the "Release Constrictor Field button". This button acts as a safety and will constantly lower the Field Integrity. | ||
| + | # Use the TAC Console on the bridge to fire the weapon. [[File:Tactical.gif|32px]] | ||
| + | Warnings: | ||
| + | * Every time the weapon is fired or misfires, the weapon's Alignment will degrade. | ||
| + | * If the weapon's alignment is less than 90%, is has a greater chance of misfiring. | ||
| + | * The weapon will not fire if the gas regulator is on or if the splines aren't fully restored. | ||
| + | *When the weapon is fired, the Splines will automatically go to 0%. This will replenish over time. | ||
| + | * Do not try to disassemble this weapon, you will regret it. | ||
| + | * The gas regulator will only take plasma gas, and no other gas. | ||
| + | * If the weapon's splines or field integrity stop restoring for any reason, toggle the constrictor field off and on again. | ||
| + | * This weapon will blind you if you're not wearing eye protection while in its presence. | ||
| + | * This weapon cannot target fighters or other small ships. | ||
| + | </div></div> | ||
| + | <div class="toccolours mw-collapsible mw-collapsed" style="width: 80%;"> | ||
| + | === [[File:Burst_Phaser.png]] Burst Phaser MK2 === | ||
| + | <span style="font-size:1.2em;">A coaxial laser system, capable of firing controlled laser bursts at a target.</span> | ||
| + | <div class="mw-collapsible-content"> | ||
| + | These energy weapons are fired in the direction the ship is currently facing, and is fired by the '''Ship Pilot''', as such you need to point the nose of the ship directly at the enemy in order to have a guaranteed chance of hitting it. | ||
| − | + | Due to being an energy weapon these guns primarily do not require a constant dedication of attention in order to maintain them, however they require a constant source of power: | |
| − | + | # Interact with the Burst Phaser Weapon | |
| − | # | + | # Toggle the Slider to the amount of power you wish to pump into the cannon, this affects how fast it recharges and how many shots it can fire before needing to recharge. |
| − | # | + | # Press the "Enable Charging" button and, assuming you have enough power in the grid, the gun will charge up and be ready to fire. |
| − | + | </div></div> | |
| + | <div class="toccolours mw-collapsible mw-collapsed" style="width: 80%;"> | ||
| + | === [[File:Phase_Cannon.png]] Phase Cannon === | ||
| + | <span style="font-size:1.2em;">An extremely powerful directed energy weapon which is capable of delivering a devastating beam attack.</span> | ||
| + | <div class="mw-collapsible-content"> | ||
| + | This energy weapon behaves similarly to the Deck Guns in terms of aiming, meaning you can be performing a valiant tactical advance in the opposite direction of the enemy and still have a vague chance to hit the target. | ||
| − | + | Due to being an energy weapon these guns primarily do not require a constant dedication of attention in order to maintain them, however they require a constant source of power: | |
| − | + | # Interact with the Phase Cannon | |
| − | + | # Toggle the Slider to the amount of power you wish to pump into the cannon, this affects how fast it recharges and how many shots it can fire before needing to recharge. | |
| − | + | # Press the "Enable Charging" button and, assuming you have enough power in the grid, the gun will charge up and be ready to fire. | |
| − | + | </div></div> | |
| − | + | <div class="toccolours mw-collapsible mw-collapsed" style="width: 80%;"> | |
| − | + | === [[File:Laser_Missile_cannon.png]] Laser Anti Missile System === | |
| − | + | <span style="font-size:1.2em;">The Energy Weapon equivalent of a modified Autonomous Missile System</span> | |
| + | <div class="mw-collapsible-content"> | ||
| + | Primarily designed to shoot down missiles using lasers rather than firing missiles at missiles and hoping it will work itself out, could probably be used for other shenanigans, such as boiling eggs | ||
| − | == | + | Due to being an energy weapon these guns primarily do not require a constant dedication of attention in order to maintain them, however they require a constant source of power: |
| − | + | # Interact with the Laser Anti Missile System | |
| − | + | # Toggle the Slider to the amount of power you wish to pump into the cannon, this affects how fast it recharges and how many shots it can fire before needing to recharge. | |
| − | ==== | + | # Press the "Enable Charging" button and, assuming you have enough power in the grid, the gun will charge up and be ready to fire. |
| − | + | </div></div> | |
| − | ! scope="col" style= | + | ==Acquiring ammunition== |
| − | ! scope="col" | + | This is inevitable, the ship will consume ammo at a rapid rate. If you are out of ammo outside of combat, the following list will instruct you on how to acquire more. If you are out of ammo mid-combat <s> you're fucked </s>, communicate this with CIC and the rest of your team and use what you have left for the other weapons while coordinating with cargo. |
| + | <div class="toccolours mw-collapsible mw-collapsed" style="width: 80%;"> | ||
| + | ===PDC=== | ||
| + | <div class="mw-collapsible-content"> | ||
| + | {| class="wikitable sortable" style="text-align:center" width="100%" | ||
| + | ! scope="col" class='unsortable' |Icon | ||
| + | ! scope="col" style='width=25%' |Name | ||
| + | ! scope="col" style='width=25%' |Purchasable | ||
| + | ! scope="col" style='width=25%' |Crate Name | ||
|- | |- | ||
| − | + | |[[File:PDCAmmo.png]] | |
| − | | | + | |Point Defense Cannon Ammo (30.12x82mm) |
| + | |Yes | ||
| + | |PDC mount rounds (x5) | ||
|- | |- | ||
| − | + | |} | |
| − | | | + | </div></div> |
| + | <div class="toccolours mw-collapsible mw-collapsed" style="width: 80%;"> | ||
| + | ===Flak=== | ||
| + | <div class="mw-collapsible-content"> | ||
| + | {| class="wikitable sortable" style="text-align:center" width="100%" | ||
| + | ! scope="col" class='unsortable' |Icon | ||
| + | ! scope="col" style='width=50%' |Name | ||
| + | ! scope="col" style='width=50%' |Found | ||
|- | |- | ||
| − | + | |[[File:FlakAmmo.png]] | |
| − | | | + | |40mm Flak Rounds |
| + | |Acquired Through Traders | ||
|- | |- | ||
| − | + | |} | |
| − | | | + | </div></div> |
| + | <div class="toccolours mw-collapsible mw-collapsed" style="width: 80%;"> | ||
| + | ===Deck Gun=== | ||
| + | <div class="mw-collapsible-content"> | ||
| + | {| class="wikitable sortable" style="text-align:center" width="100%" | ||
| + | ! scope="col" class='unsortable' |Icon | ||
| + | ! scope="col" style='width=25%' |Name | ||
| + | ! scope="col" style='width=25%' |Purchasable | ||
| + | ! scope="col" style='width=25%' |Crate Name | ||
| + | ! scope="col" style='width:25%' |Researchable | ||
| + | ! scope="col" style='width:25%' |Printable in | ||
|- | |- | ||
| − | + | |[[File:NAV_Shell.png]] | |
| − | | | + | |FTL-13 Naval Artillery Round |
| − | + | |Yes | |
| + | |Naval Artillery Shells (x10) | ||
| + | |Yes | ||
| + | |Munitions Techfab | ||
|- | |- | ||
| − | + | |[[File:NAV_Cannonball.png]] | |
| − | | | + | |Cannonballs |
| + | |Yes | ||
| + | |Cannonballs (x10) | ||
| + | |No | ||
| + | |N/A | ||
|- | |- | ||
| − | + | |[[File:NAV_AP_Shell.png]] | |
| − | |A | + | |TX-101 Armour Penetrating Naval Artillery Round |
| + | |No | ||
| + | |N/A | ||
| + | |Yes | ||
| + | |Munitions Techfab | ||
|- | |- | ||
| − | + | |[[File:Gunpowder_bag.png]] | |
| − | | | + | |Gunpowder Bag |
| + | |Yes | ||
| + | |Powder bags (x10) | ||
| + | |Yes | ||
| + | |Munitions Techfab | ||
|- | |- | ||
| − | + | |[[File:Plasma-Accelerant.png]] | |
| − | | | + | |Plasma-Based Projectile Accelerant |
| + | |No | ||
| + | |N/A | ||
| + | |Yes | ||
| + | |Munitions Techfab | ||
|- | |- | ||
| − | + | |} | |
| − | + | </div></div> | |
| − | + | <div class="toccolours mw-collapsible mw-collapsed" style="width: 80%;"> | |
| − | |- | + | ===Torpedoes and Missiles=== |
| − | ![[File: | + | <div class="mw-collapsible-content"> |
| − | | | + | Torpedoes and missiles, unfortunately, cannot be ordered fully assembled and must be built by your own oil-covered hands. You need multiple things from cargo - components, casings, and warheads. Standard and armor piercing warheads can be ordered from cargo, but the other types must be researched by science before they can be made in the protolathe. Once you have all of these, turn on that conveyor belt and get this party started! |
| − | | | + | {| class="wikitable" border="1" cellspacing="0" style="width:80%; background-color:#FFFFFF;" |
| − | ! | + | ! rowspan="2" style='background-color:#cce6ff;'|[[File:MissileTorp.gif]]<br>Missiles/Torpedoes |
| − | + | ! style='background-color:#99ccff; width:20%'|Requires to build | |
| + | ! style='background-color:#99ccff'|How to build | ||
| + | ! style='background-color:#99ccff; width:20%; text-align: center'|Tools | ||
|- | |- | ||
| + | | | ||
| + | [[File:Metal.png|Metal]]x5-15 (Depending on the Type)<br> | ||
| + | [[File:Trop_prop.png|Propulsion System]]x1<br> | ||
| + | [[File:Torp_guide.png|Guidance System]]x1<br> | ||
| + | [[File:Torp_iff.png|IFF card]]x1<br> | ||
| + | [[File:CableCoils.png|Cable]]x5<br> | ||
| + | [[File:Warheads.gif|Warhead]]x1<br> | ||
| + | | | ||
| + | # Get a casing, either made from metal or ordered from cargo. | ||
| + | # Add the '''Propulsion System''' | ||
| + | # '''Wrench''' the propulsion into place. | ||
| + | # Add the '''Guidance System''' | ||
| + | # '''Screwdriver''' the guidance system in place. | ||
| + | # Add the '''IFF card''' | ||
| + | # '''Screwdriver''' the card in place. | ||
| + | # Add the '''Warhead''' | ||
| + | # '''Wrench''' the warhead in place. | ||
| + | # '''Wire''' it. | ||
| + | # '''Wrench''' once more. | ||
| + | # '''Weld''' it all together. | ||
| + | | | ||
| + | [[File:Wrench.png|Wrench]]<br> | ||
| + | [[File:Screwdriver tool.png|Screwdriver]]<br> | ||
| + | [[File:Crowbar.png|Crowbar]]<br> | ||
| + | [[File:Wirecutters.png|Wirecutter]]<br> | ||
| + | [[File:Welder.png|Welding tool]] | ||
|} | |} | ||
| + | There are a total of six different types of torpedoes you can make. Each serves a different purpose. | ||
| + | * Standard torpedoes are your stock standard torps. They carry an explosive payload that does a fair amount of damage to ships and fighters alike. | ||
| + | * Armor piercing torpedoes are able to do heavy damage to armored targets. Good against large ships. | ||
| + | * Nuclear torpedoes are the most powerful of the explosive torpedoes. They deal devastating damage to anything they hit, but are slower and more expensive than the other torpedo types. Use them wisely, as you won't be able to make more until science researches them. | ||
| + | * Decoy torpedoes don't carry an explosive payload, but can be used to distract an enemy's defensive weapons, giving you a clear shot for your more powerful weapons. | ||
| + | * Freight torpedoes are essentially cargo pods. Load them up and fire them at another ship to deliver the goods. | ||
| + | * Probes are torpedoes strapped with an array of scientific sensors. Firing one of these at an anomaly will generate research for science, and potentially unlock new technology nodes. Don't miss. | ||
| + | Unfortunately it's only possible to construct one type of missile right now. | ||
| + | * High-velocity missiles are the standard missile type, they explode upon making impact and do a moderate amount of damage. | ||
| + | ====Autonomous Missile Factory==== | ||
| + | [[File:TCMissileRoom.png|right|thumb|The missile factory on the [[Tycoon]]]] | ||
| + | So you thought you had to wrench, weld and wire each missile individually? Of course not! The future is now! There's a quick and easy way to mass-produce missiles available right in the middle of your munitions bay: The factory line. | ||
| − | + | The Missile factory consists of three key parts: the conveyor belts, which have usually been slowed down to accommodate for the working speed of the robots. Tool arms, which use specific tools on the casing and are colored grey, and red colored part arms that apply parts such as guidance computers to the missiles. | |
| − | + | The robot arms in the factory always apply their effect in the direction the red arrows on their frame are pointing, but can be loaded with parts from any direction. They also have no part holding limit, so you can fill them up with as many parts as you want. | |
| − | + | You can even extend the factory! The parts required for making factory machines can all be printed in the munilathe along with the conveyor belts after their research has been completed. | |
| − | ! scope="col" | + | </div></div> |
| − | ! scope="col" | + | <div class="toccolours mw-collapsible mw-collapsed" style="width: 80%;"> |
| + | ===Broadside Cannon=== | ||
| + | <div class="mw-collapsible-content"> | ||
| + | To create more Broadside Shells, do the following: | ||
| + | # Acquire Five Broadside Shell Casing: [[File:Broadside_casing.png]] | ||
| + | # Insert the Casings into the Broadside Shell Packer Bench: [[File:PackingBench.png]] '''=>''' [[File:PackingBench_casings.png]] | ||
| + | # Acquire Five Broadside Shell Loads: [[File:Broadside_load.png]] | ||
| + | # Insert the Loads into the Broadside Shell Packer Bench: [[File:PackingBench_casings.png]] '''=>''' [[File:PackingBench_loads.png]] | ||
| + | # Acquire the propellant of choice (either gunpowder or plasma-based accelerant): [[File:NAC_Propellant.gif]] | ||
| + | # Insert your propellant of choice into the Broadside Shell Packer Bench: [[File:PackingBench_loads.png]] '''=>''' [[File:PackingBench_full.png]] | ||
| + | # Interact with the Broadside Shell Packer Bench and hit "Pack Casings" [[File:PackingBench.png]] | ||
| + | To acquire more Shell casings or shell loads, see the following Table: | ||
| + | {| class="wikitable sortable" style="text-align:center" width="100%" | ||
| + | ! scope="col" class='unsortable' |Icon | ||
| + | ! scope="col" style='width=25%' |Name | ||
| + | ! scope="col" style='width=25%' |Purchasable | ||
| + | ! scope="col" style='width=25%' |Crate Name | ||
| + | |- | ||
| + | |[[File:Broadside_casing.png]] | ||
| + | |Broadside Shell Casing | ||
| + | |Yes | ||
| + | |Empty Broadside Casings/Broadside Pack | ||
| + | |- | ||
| + | |[[File:Broadside_load.png]] | ||
| + | |Broadside Shell Loads | ||
| + | |Yes | ||
| + | |Broadside Loads/Broadside Pack | ||
|- | |- | ||
| − | + | |} | |
| − | | | + | </div></div> |
| + | <div class="toccolours mw-collapsible mw-collapsed" style="width: 80%;"> | ||
| + | ===Magnetic Phoron Acceleration Caster=== | ||
| + | <div class="mw-collapsible-content"> | ||
| + | {{Test Merge | ||
| + | |link = [https://github.com/BeeStation/NSV13/pull/2132 #2132] | ||
| + | }} | ||
| + | {| class="wikitable sortable" style="text-align:center" width="100%" | ||
| + | ! scope="col" class='unsortable' |Icon | ||
| + | ! scope="col" style='width=25%' |Name | ||
| + | ! scope="col" style='width:25%' |Researchable | ||
| + | ! scope="col" style='width:25%' |Printable in | ||
|- | |- | ||
| − | + | |[[File:Plasma_Core.png]] | |
| − | | | + | |Condensed Phoron Core |
| + | |Yes | ||
| + | |Munitions Techfab | ||
|- | |- | ||
| − | |||
| − | |||
|} | |} | ||
| + | </div></div> | ||
| + | <div class="toccolours mw-collapsible mw-collapsed" style="width: 80%;"> | ||
| + | ===NT-ST049 'Sturm' coaxial railgun=== | ||
| + | <div class="mw-collapsible-content"> | ||
| + | The method of acquiring more railgun slugs for this weapon is semi-complicated. | ||
| − | + | You need to locate the "Defunct Railgun Techology Munitions Technology Disk" which can be found in Munitions, assuming some clown hasn't eaten it or it's been dusted in the Supermatter shard. | |
| − | |||
| − | + | With this Technology Disk you need to upload the blueprints to the Techweb using a Research and Development Console, '''DO NOT DELETE THE BLUEPRINTS CONTAINED ON IT'''. | |
| − | |||
| − | + | After you have uploaded the blueprints you can now print the Railgun Slugs in either the Cargo or Munitions Techfab | |
| − | + | </div></div> | |
| − | + | ==You're ready== | |
| − | + | It may be difficult to swallow all of the information you've read, but don't worry! You'll very rarely be working with all of these weapons at once as you have fellow Munitions Technicians at your side to pick up your slack. Above all, remember to have fun. With a bottle of spray paint, you can do all manner of things - name your torpedo tubes, draw funny faces near the PDC racks, and draw the borderline between the rest of the ship and the newly independent Munitia. | |
| − | + | ==More Dakka== | |
| − | + | Is the ships just floating around in friendly space? Are all the guns loaded and you have nothing better to do? Or are those glorified laser pointers simply not enough? Fear not, because now you can even BUILD more guns! From the smallest PDC to the largest Railgun, you can outfit your ship with all the firepower. | |
| − | {| border="1" cellspacing="0" | + | '''Disclaimer:''' You can't print new weapon circuit boards. This means that whatever weaponry you had roundstart, you are stuck with those. However, you can still move them. |
| − | + | ||
| − | ! | + | With that out of the way, here is a tip if you want to arm your ship: |
| − | ! | + | *Don't overestimate how much ammo you have. Because while making the ship into a giant sniper rifle with 20 NACs might be fun, cargo WILL swiftly run dry of credits trying to supply you with ammo. 30 PDCs WILL destroy all the Torpedoes launched at you, but the crew will easily go deaf from all the pom-pom-pom. |
| − | ! | + | **For this reason, giving the [[Master_At_Arms|Munitions budget card]] to cargo is highly recommended. |
| + | Here is how you can construct ship weaponry: | ||
| + | === PDC loading rack === | ||
| + | {| class="wikitable" border="1" cellspacing="0" style="width:80%; background-color:#FFFFFF;" | ||
| + | !rowspan="2" style='background-color:#cce6ff;'|[[File:PDCrack.gif]]<br>PDC loading rack | ||
| + | ! style='background-color:#99ccff; width:20%'|Requires to build | ||
| + | ! style='background-color:#99ccff'|How to build | ||
|- | |- | ||
| − | + | |[[File:Metal.png|Metal]]x5<br>[[File:CableCoils.png|Cable]]x4<br>[[File:Circuitboard.png|Point Defense Cannon circuit board]]Point Defense Cannon circuit board<br>[[File:Micro Manipulator.png|Micro-mainpulator]]x4<br>[[File:Capacitor.png|Capacitor]]x2<br>[[File:Matter bin.png|Matter bin]]x3<br>[[File:Wrench.png|Wrench]]<br>[[File:Screwdriver_tool.png|Screwdriver]] | |
| − | | | + | |style="vertical-align: top; padding: 10px;"| |
| − | + | # Build and the PDC loading rack frame from '''5 metal''' | |
| + | # '''Put''' it on a wall | ||
| + | # '''Wrench''' it on | ||
| + | # '''Wire''' it | ||
| + | # Add the '''Circuit board''' | ||
| + | # Add '''4 micro-manipulators''' | ||
| + | # Add '''2 capacitors''' | ||
| + | # Add '''3 matter bins''' | ||
| + | ## You can do this using an RPED | ||
| + | # Add the '''Firing electronics''' | ||
| + | ## The order of these 4 steps does not matter | ||
| + | # '''Screwdriver''' it to finish the machine | ||
| + | <br> | ||
|- | |- | ||
| − | ! | + | !colspan="3" style="background-color:#99ccff"|How to deconstruct |
| − | |||
| − | |||
|- | |- | ||
| − | ! | + | !colspan="1" style='background-color:#99ccff; width:20%'|Tools |
| − | | | + | |rowspan="2" colspan="3"| |
| − | + | # '''Screw''' the maintenance panel out | |
| + | # '''Pry''' the parts out | ||
| + | # '''Cut''' the wiring | ||
| + | # '''Unwrench''' the frame | ||
| + | # '''Lift it off''' the wall with your hands | ||
|- | |- | ||
| − | + | |colspan="1" style="text-align: center;"| | |
| − | | | + | [[File:Wrench.png|Wrench]]<br>[[File:Screwdriver tool.png|Screwdriver]]<br>[[File:Crowbar.png|Crowbar]]<br>[[File:Wirecutters.png|Wirecutter]] |
| − | + | |} | |
| − | + | === Torpedo Tube === | |
| − | + | {| class="wikitable" border="1" cellspacing="0" style="width:80%; background-color:#FFFFFF;" | |
| − | + | !rowspan="2" style='background-color:#cce6ff;'|[[File:NewTorpTube.png|64px]]<br>Torpedo Tube | |
| − | + | ! style='background-color:#99ccff; width:20%'|Requires to build | |
| − | | | + | ! style='background-color:#99ccff'|How to build |
| − | |||
| − | |||
| − | |||
| − | |||
| − | |||
| − | |||
| − | |||
| − | |||
| − | |||
| − | |||
| − | |||
| − | |||
| − | |||
| − | | | ||
| − | |||
| − | |||
| − | |||
| − | |||
| − | |||
| − | |||
| − | |||
| − | |||
| − | |||
| − | |||
| − | |||
| − | | | ||
| − | |||
| − | |||
| − | |||
| − | |||
| − | |||
| − | |||
| − | |||
| − | |||
| − | |||
| − | |||
| − | |||
| − | |||
| − | |||
| − | |||
| − | |||
| − | |||
| − | |||
| − | |||
| − | ! | ||
| − | |||
| − | |||
| − | |||
| − | |||
| − | |||
| − | |||
| − | |||
| − | |||
| − | |||
| − | |||
| − | | | ||
| − | |||
| − | |||
| − | ! | ||
| − | |||
| − | |||
| − | |||
| − | |||
| − | |||
| − | |||
| − | |||
| − | |||
| − | |||
| − | |||
| − | |||
| − | ! | ||
| − | |||
| − | |||
| − | |||
| − | |||
| − | |||
| − | |||
| − | |||
| − | |||
| − | |||
| − | |||
| − | |||
| − | |||
|- | |- | ||
| − | + | |[[File:Metal_r.png|Plasteel]]x4<br>[[File:Nanoglass.png|Nanocarbon glass]]x6<br>[[File:FiringBoard.png|Firing Electronics]]x1<br>[[File:Welder.png|Welding tool]]<br>[[File:Screwdriver tool.png|Screwdriver]]<br>[[File:Wrench.png|Wrench]]<br> | |
| − | | | + | |style="vertical-align: top; padding: 10px;"| |
| + | # Build Torpedo Tube frame from 4 '''Plasteel Sheets''' | ||
| + | # '''Wrench''' it into place | ||
| + | # '''Weld''' it to the floor | ||
| + | # Add the '''Nanocarbon glass''' for the barrel | ||
| + | # '''Wrench''' the barrel in | ||
| + | # '''Wire''' the frame | ||
| + | # Add the '''Firing Electronics''' | ||
| + | # '''Screw''' the electronics in | ||
| + | # Add the '''Nanocarbon glass''' for the door | ||
| + | # '''Wrench''' the door in place | ||
| + | # '''Screw''' the maintenance hatch | ||
| + | <br> | ||
|- | |- | ||
| − | ! | + | !colspan="3" style="background-color:#99ccff"|How to deconstruct |
| − | |||
| − | |||
|- | |- | ||
| − | ! | + | !colspan="1" style='background-color:#99ccff; width:20%'|Tools |
| − | | | + | |rowspan="2" colspan="3"| |
| − | + | # '''Screw''' the maintenance panel out | |
| + | # '''Wrench''' the inner casing | ||
| + | ## Note: The weapon can now be lubricated | ||
| + | # '''Pry''' the casing out | ||
| + | # '''Unscrew''' the door frame | ||
| + | # '''Wrench''' the door out | ||
| + | # '''Pry''' the door out of the frame | ||
| + | # '''Unscrew''' the electronics | ||
| + | # '''Pry''' the electronics out of their place | ||
| + | # '''Cut''' the wires away | ||
| + | # '''Unbolt''' the barrel | ||
| + | # '''Pry''' the barrel out | ||
| + | # '''Unweld''' the frame from the floor | ||
| + | # '''Unbolt''' the frame | ||
| + | # '''Weld''' the frame apart | ||
|- | |- | ||
| − | + | |colspan="1" style="text-align: center;"| | |
| − | + | [[File:Wrench.png|Wrench]]<br>[[File:Welder.png|Welding tool]]<br>[[File:Screwdriver tool.png|Screwdriver]]<br>[[File:Crowbar.png|Crowbar]]<br>[[File:Wirecutters.png|Wirecutter]] | |
| − | |||
| − | |||
| − | |||
| − | |||
| − | |||
| − | |||
| − | |||
| − | |||
| − | |||
| − | |||
| − | |||
| − | |||
| − | |||
| − | |||
| − | |||
| − | |||
| − | |||
| − | |||
| − | |||
| − | |||
| − | |||
| − | |||
| − | |||
| − | |||
| − | |||
| − | |||
| − | |||
| − | | | ||
| − | |||
| − | |||
| − | |||
| − | |||
| − | |||
| − | |||
| − | |||
| − | |||
| − | |||
| − | |||
| − | |||
| − | |||
| − | |||
| − | | | ||
| − | |||
| − | |||
| − | |||
| − | |||
| − | |||
| − | |||
| − | |||
| − | |||
| − | |||
| − | |||
| − | |||
| − | |||
| − | |||
| − | |||
| − | |||
| − | |||
| − | |||
| − | |||
| − | |||
| − | |||
| − | |||
| − | |||
| − | |||
|} | |} | ||
| − | + | === VLS launch tube === | |
| − | == | + | {| class="wikitable" border="1" cellspacing="0" style="width:80%; background-color:#FFFFFF;" |
| − | + | !rowspan="2" style='background-color:#cce6ff;'|[[File:AMS tube.png]]<br>VLS launch tube | |
| − | + | ! style='background-color:#99ccff; width:20%'|Requires to build | |
| − | {| border="1" cellspacing="0" | + | ! style='background-color:#99ccff'|How to build |
| − | |||
| − | ! | ||
| − | |||
| − | | | ||
| − | |||
| − | |||
| − | | | ||
| − | ! | ||
| − | |||
|- | |- | ||
| − | + | |[[File:Metal.png|Metal]]x35<br>[[File:Titaniumdone.png|Titanium]]x20<br>[[File:Copperdone.png|Copper]]x20<br>[[File:CableCoils.png|Cable]]x10<br>[[File:Circuitboard.png|VLS launch tube board]]VLS launch tube board<br>[[File:Wrench.png|Wrench]]<br>[[File:Screwdriver_tool.png|Screwdriver]] | |
| − | | | + | |style="vertical-align: top; padding: 10px;"| |
| + | # Build and wire a Machine Frame from '''5 metal''' | ||
| + | ## Click [[Guide_to_construction#Machines|here]] for a detailed construction. | ||
| + | # Add the '''Circuit board''' | ||
| + | # Add '''20 titanium''' | ||
| + | # Add '''30 metal''' | ||
| + | # Add '''20 copper''' | ||
| + | # Add '''10 cable''' | ||
| + | # '''Screwdriver''' it to finish the machine | ||
| + | <br> | ||
|- | |- | ||
| − | ! | + | !colspan="3" style="background-color:#99ccff"|How to deconstruct |
| − | |||
|- | |- | ||
| − | ! | + | !colspan="1" style='background-color:#99ccff; width:20%'|Tools |
| − | | | + | |rowspan="2" colspan="3"| |
| + | # '''Screw''' the maintenance panel out | ||
| + | # '''Wrench''' the inner casing | ||
| + | # '''Pry''' the casing out | ||
|- | |- | ||
| − | + | |colspan="1" style="text-align: center;"| | |
| − | + | [[File:Wrench.png|Wrench]]<br>[[File:Screwdriver tool.png|Screwdriver]]<br>[[File:Crowbar.png|Crowbar]]<br> | |
| − | |- | ||
| − | |||
| − | | | ||
| − | |||
| − | |||
| − | |||
| − | |||
| − | |||
| − | |||
| − | |||
| − | |||
| − | |||
| − | |||
| − | |||
| − | |||
| − | |||
| − | |||
| − | |||
|} | |} | ||
| − | + | === Naval Artillery === | |
| − | + | {| class="wikitable" border="1" cellspacing="0" style="width:80%; background-color:#FFFFFF;" | |
| − | + | !rowspan="2" style='background-color:#cce6ff;'|[[File:Deck gun.png]]<br>[[File:Deck gun building.png|160px|A possible arrangement of the Deck Gun's part, with the individual parts highlighted for you]]<br>Naval Artillery | |
| − | + | ! style='background-color:#99ccff; width:20%'|Requires to build | |
| − | == | + | ! style='background-color:#99ccff'|How to build |
| − | |||
| − | |||
| − | {| border="1" cellspacing="0" | ||
| − | |||
| − | ! | ||
| − | |||
| − | |||
| − | |||
| − | ! | ||
| − | ! | ||
|- | |- | ||
| − | + | |[[File:Titaniumdone.png|Titanium]]x120<br>[[File:Metal_r.png|Plasteel]]x22<br>[[File:Metal.png|Metal]]x35<br>[[File:Copperdone.png|Copper]]x50<br>[[File:Diamonddone.png|Diamond]]x5<br>[[File:Duranium.png|Duranium]]x1<br>[[File:CableCoils.png|Cable]]x34<br>[[File:FiringBoard.png|Firing Electronics]]x1<br>[[File:Circuitboard.png|Deck gun core board]]Deck gun core board<br>[[File:Circuitboard.png|Deck gun payload gate board]]Deck gun payload gate board<br>[[File:Circuitboard.png|Deck gun powder gate board]]Deck gun powder gate board<br>[[File:Circuitboard.png|Deck gun auto elevator board]]Deck gun auto elevator board<br>[[File:Circuitboard.png|Deck gun loading computer board]]Deck loading computer board<br>[[File:Igniter.png|Igniter]]x1<br>[[File:Welder.png|Welding tool]]<br>[[File:Screwdriver tool.png|Screwdriver]]<br>[[File:Wrench.png|Wrench]]<br> | |
| − | + | |style="vertical-align: top; padding: 10px;"| | |
| − | + | # Designate a '''3 x 3''' space with a '''free tile on the floor above it''' for your gun | |
| − | + | ==== Building the indoors, multitile part ==== | |
| − | + | # Build and wire a Machine Frame from '''5 metal''' in the middle for your Core | |
| − | + | ## Click [[Guide_to_construction#Machines|here]] for a detailed construction. | |
| − | | | + | # Build and wire ''at least three'' Machine Frames and a Computer frame from '''20 metal''' around your Core, these will be the other parts of your Deck Gun |
| + | ## Click [[Guide_to_construction#Machines|here]] for a detailed construction. | ||
| + | ## Note: Which machine frame will become which machine does not matter, only that they are next to the core | ||
| + | # Add the '''Deck gun core board''' to the machine frame in the ''middle'' | ||
| + | ## Marked on the picture with ''Red'' | ||
| + | # Add '''20 titanium''' and '''5 cable''' | ||
| + | # '''Screwdriver''' to finish the core | ||
| + | # Add the '''Deck gun payload gate board''' | ||
| + | ## Marked on the picture with ''Blue'' | ||
| + | # Add '''40 titanium''', '''10 cable''' and '''10 copper''' | ||
| + | # Add a '''Railgun rail''' | ||
| + | ## Note: Can be made from 1 duranium | ||
| + | # Add the '''Loading tray''' | ||
| + | ## Note: It's made from 10 metal | ||
| + | # '''Screwdriver''' to finish the payload gate | ||
| + | # Add the '''Deck gun powder gate board''' | ||
| + | ## Marked on the picture with ''Purple'' | ||
| + | ## Building more of these machines does not increase the number of gunpowder that can be inserted, as you can insert multiple from just one gate | ||
| + | # Add '''20 titanium''', '''5 cable''' and '''20 copper''' | ||
| + | # '''Screwdriver''' to finish the gate | ||
| + | # Add the '''Deck gun auto elevator board''' | ||
| + | ## Marked on the picture with ''Yellow'' | ||
| + | # Add '''40 titanium''', '''10 cable''', '''20 copper''' and '''5 diamonds''' | ||
| + | # '''Screwdriver''' to finish the elevator | ||
| + | # Build a '''chair''' from any material | ||
| + | ## Marked on the picture with ''White'' | ||
| + | ## ANY chair will do | ||
| + | # Add the '''Deck gun loading computer board''' to the Computer frame | ||
| + | ## Marked on the picture with ''Green'' | ||
| + | # Finish the construction '''[[Guide_to_construction#Computers|like usual]]''' | ||
| + | # If all machines are done, hit the Core with a '''Multitool''' to have it scan for nearby machines | ||
| + | ==== Building the outdoors part ==== | ||
| + | # Go to the deck '''above you''', on the '''same spot as your Core''' | ||
| + | ## Use a GPS | ||
| + | # Build a Deck gun frame from '''20 plasteel''' | ||
| + | # '''Wrench''' it to the ground | ||
| + | # '''Weld''' it down | ||
| + | # Add the '''firing electronics''' | ||
| + | # '''Screw''' the electronics in | ||
| + | # Add an '''Igniter''' | ||
| + | ## Alternatively, you can add a ''Triple Barrel Upgrade'' (currently Admin only) | ||
| + | ## ''Screw'' the upgrade in | ||
| + | ## Add 3 ''igniters'' | ||
| + | # '''Screw''' the Igniters in | ||
| + | # '''Wire''' the Igniters | ||
| + | # '''Weld''' the wiring down | ||
| + | # Add 2 '''plasteel''' | ||
| + | # Add a '''MAC barrel''' | ||
| + | ## Can be made from 1 duranium | ||
| + | ## In case the gun was upgraded, add ''3 of these'' | ||
| + | # '''Weld''' the barrels down | ||
| + | # Add the '''Loading tray''' | ||
| + | ##Note: It's made from 10 metal | ||
| + | <br> | ||
|- | |- | ||
| − | ! | + | !colspan="3" style="background-color:#99ccff"|How to deconstruct |
| − | |||
| − | |||
| − | |||
| − | |||
| − | |||
| − | |||
|- | |- | ||
| − | ! | + | !colspan="1" style='background-color:#99ccff; width:20%'|Tools |
| − | + | |rowspan="2" colspan="3"| | |
| − | + | The frame can be deconstructed this way: | |
| − | + | # '''Screw''' the maintenance panel out | |
| − | + | ## If you examine the gun, there will be a button labeled "Force Eject Shell". Be warned, this will '''fire the shell'''. | |
| − | + | # '''Wrench''' the inner casing | |
| − | + | # '''Pry''' the loading tray out | |
| + | # '''Unweld''' the barrel | ||
| + | # '''Pry''' the barrel out | ||
| + | # '''Unweld''' the inner plasteel casing | ||
| + | # '''Unweld''' the wiring | ||
| + | # '''Cut''' the wiring out | ||
| + | # '''Unscrew''' the igniters | ||
| + | # '''Remove''' the igniters by hand | ||
| + | ## If it was upgraded with a ''Tripple Barrel'' upgrade, you need to ''Unscrew'' it | ||
| + | ## Then ''Pry'' it out | ||
| + | # '''Unscrew''' the firing electronics | ||
| + | # '''Pry''' the electronics out | ||
| + | # '''Unweld''' the frame from the floor | ||
| + | # '''Unbolt''' the frame from the floor | ||
| + | # '''Cut''' the frame apart with a welder | ||
| + | The machines can be deconstructed this way: | ||
| + | # '''Screw''' the maintenance panel out | ||
| + | # Remove the components and the circuit board with a '''crowbar''' | ||
| + | # '''Cut''' the wires out | ||
| + | # '''Unwrench''' the frame from the ground | ||
| + | # Dissasemble the frame with a '''screwdriver''' | ||
|- | |- | ||
| − | + | |colspan="1" style="text-align: center;"| | |
| − | + | [[File:Wrench.png|Wrench]]<br>[[File:Welder.png|Welding tool]]<br>[[File:Screwdriver tool.png|Screwdriver]]<br>[[File:Crowbar.png|Crowbar]]<br>[[File:Wirecutters.png|Wirecutter]] | |
| − | |||
| − | |||
| − | |||
| − | |||
| − | |||
| − | |||
| − | |||
| − | |||
| − | |||
| − | |||
| − | |||
| − | |||
| − | |||
| − | |||
| − | |||
| − | |||
| − | |||
| − | |||
| − | |||
| − | |||
| − | |||
| − | |||
| − | |||
| − | |||
| − | |||
| − | |||
| − | |||
| − | |||
| − | |||
| − | |||
| − | |||
| − | |||
| − | |||
| − | |||
| − | |||
| − | |||
| − | |||
| − | |||
| − | |||
| − | |||
| − | |||
| − | |||
| − | |||
| − | |||
| − | |||
| − | |||
| − | |||
| − | |||
| − | |||
| − | |||
| − | |||
| − | |||
| − | |||
| − | |||
| − | |||
| − | |||
| − | |||
| − | |||
| − | |||
| − | |||
| − | |||
| − | |||
| − | |||
|} | |} | ||
| + | As said before, this is advanced stuff, usually you don't need to build new guns, and it's one hell of a job to try and keep them all loaded. But it does take up the downtime that you otherwise would have spent in the bar, and some <s> weird </s> people might find it fun. | ||
| − | = | + | <font size=1>*Nanotrasen brand gunpowder is not suitable for use in hot or burning environments, keep away from children with lighters.</font> |
| − | + | [[Category:Guides]] | |
| − | |||
| − | |||
| − | * | ||
| − | |||
| − | |||
| − | |||
| − | |||
| − | |||
| − | |||
| − | |||
| − | |||
| − | |||
| − | |||
| − | |||
| − | |||
| − | |||
| − | |||
| − | |||
| − | |||
| − | |||
| − | |||
| − | |||
| − | |||
| − | |||
| − | |||
| − | |||
| − | |||
| − | |||
| − | |||
| − | |||
| − | |||
| − | |||
| − | |||
| − | |||
| − | |||
| − | |||
| − | |||
| − | |||
| − | |||
| − | |||
| − | |||
| − | |||
| − | |||
| − | |||
| − | |||
| − | |||
| − | |||
| − | [[Category: | ||
Latest revision as of 09:18, 23 October 2023
Do you long for new experiences? Are you comfortable working under pressure? Do you do well when working with explosives? Like making things go boom? If so, this is the guide for you! If you follow these simple instructions you will be prepared to load and maintain all of the weapons on your assigned vessel and qualified to call yourself a professional Munitions Technician. Be wary though, much like the goalie on a professional soccer team, you're the first one to blame if things go sour in combat, second only to the command staff, but if you can't handle the heat - stay out of the munitions bay.
Operating the guns[edit | edit source]

|
No smoking!
Missiles, gunpowder bags and artillery shells blow up very easily, even from the smallest spark. Don't smoke, use welders, etc. in the weapons bay. |
As a Munitions Technician, munitions assigned squad member, or Master At Arms, your job is to supply and control the various weapons on the ship to make sure they continue firing. This includes 50 Cal. Cannons, Railguns, Artillery cannons, Torpedo tubes, Gauss turrets, and the Automated Missile System (AMS). The faster you can load and prepare these weapons, the faster they can open fire on enemy ships. Do note that not all of the weapons listed here may be on your assigned vessel, so be certain to take inventory at the beginning of a shift and prepare accordingly for each weapon's needs.
 Point Defense Cannons[edit | edit source]
Point Defense cannons (PDCs) are the lifeblood of short ranged combat
Serving as a rapid-fire weapon that is effective at taking down enemy fighters that other weapons may miss and destroying incoming missiles and torpedoes.
Luckily for you, loading these cannons is as easy as firing them:
- Go to the empty loading rack on the wall

- Insert a Full PDC Ammo Box

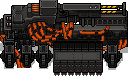
 Artillery Cannon (Deck Gun)[edit | edit source]
The deck guns are massive cannons that, when operated correctly, can obliterate any enemy in an instant.

They fire heavy projectiles which need to be primed before loading and are fueled with gunpowder which is used to propel the ammunition.
Loading Naval Artillery goes like this:
- Acquire a projectile:

- Arm the projectile with a multitool:
 =>
=> 

- Drag it onto the Payload Loading Gate:
 =>
=> 
- Acquire the propellant of choice (either gunpowder or plasma-based accelerant):

- Load the propellant into the Powder Loading Gate:
 =>
=> 
- Go to the console and hit "Pack from loader":

- Repeat these steps many times if you want a faster shot. You will generally load 6 bags of normal gunpowder.
- Go back to the Console, and hit "Feed Shell":
- Voila! The shell is ready to fire. After the gun has fired - you will hear that anywhere on the ship - repeat these steps
It's important to note that there is no limit to how much gunpowder can be loaded at one time, meaning you can insert only 1 or even 20 bags of powder. Most of the time you'll want to put in a fair amount (about 5 bags or more) of powder as the cannon round travels very slowly without it, but it's best to get in contact with the ship's tactical systems operator (one of the bridge staff) about this if possible. If you let them know how much powder you're going to load they'll be able to maximize damage output.
To see how much power is behind each shot, look on the console. It will tell you how much propellant is packed in, in units called dT. Unpacked shells start out with 25% dT, 1 bag of gunpowder adds 25% dT, and one unit of plasma-based accelerant adds 50% dT. A Hungry gunpowder bag's dT% varies greatly depending on how much it has been fed.
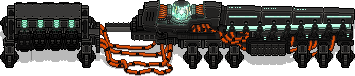
 Autonomous Missile System (AMS)[edit | edit source]
Control system for firing Missiles Automatically!
The automated missile system is a series of missile tubes linked up to a central computer, this allows it to fire missiles and torpedos automatically at targeted enemies, which are capable of dealing incredible damage and can home in on the enemy ships, making shots almost always guaranteed to hit. Loading the missiles is simple, requiring them to be assembled and then dragged onto the tube. Then walk over to the assigned Ordenance Computer, click "Payload Loaded" then "Payload Chambered". Don't forget to turn off safeties!
Controlling the AMS is fairly simple, as you can do it with the press of a button. Simply walk over to the AMS control console and select one of two firing modes:
Anti-ship[edit | edit source]
While using the anti-ship firing mode, the targeting system fires its missiles at enemy ships within its detection radius. It will also fire at enemy ships that have been targeted by fighters.
Countermeasure[edit | edit source]
If you select the countermeasure firing mode, the system will prioritize targeting incoming gunfire to avoid the ship getting hit. It also fires at ships within the detection radius if there's no incoming projectiles.
 Torpedo Tubes[edit | edit source]
Torpedo tubes are the slower, bulkier counterparts of VLS tubes.
Torpedo tubes are slow loading, require maintenance, but are capable of dealing incredible damage and can home in on the enemy ships, making shots almost always guaranteed to hit. They have mostly been replaced by VLS tubes, given their easier maintenance and automation. However, you may still see them on some ships.
To load a torpedo tube, acquire a pre-made torpedo by dragging one onto a trolley (trolleys have a capacity of 5 torpedos) and bringing it over to the tube. Click on the trolley, click a torpedo to detach it, then drag and drop the torpedo into the tube to begin loading it. Afterward, use the adjacent console and press "Load tray", "Chamber Tray Payload", and finally "Disengage safeties" to finish loading the Torpedo tube. Remember to re-engage the Torpedo tube safeties whenever reloading to prevent damage
Maintenance[edit | edit source]
Torpedo tubes require maintenance when they're used too much. You probably want to perform maintenance between each bout of combat.
Note: Make sure there's nothing in the weapon and that the safeties are on, to prevent unnecessary explosions.
- Unscrew the maintenance hatch on the primary external casing
- Unbolt (wrench) the internal maintenance panel
- Apply 10 units of Oil to the exposed internal machinery, repeat as needed
- Bolt (wrench) the panel, then fix (screwdriver) the hatch back in place
 Gauss Guns[edit | edit source]

Gauss guns fire 300mm Teflon coated tungsten rounds.
Unlike other ship weaponry, these are not controlled by Bridge Staff using the tactical console and are typically manned by Munitions Technicians. Gauss guns require no maintenance.
To man gauss guns, buckle yourself into the gauss gunner chair and you'll rise into the cockpit above. To fire, click on the overmap to fire a powerful short-range burst. Gauss guns eat through ammo quickly, and you'll ideally want someone below deck keeping you loaded at all times. Loading tungsten rounds is as simple as placing them in a crate, click-dragging it to the loading rack, and sending it up for reloading. Additional slugs can be acquired from a nearby Gauss ammunition dispenser that can be upgraded by science to produce slugs at a faster rate.
Gauss ammo racks can be upgraded by researching Guided Munitions, then printing the respective circuit board and applying it to the rack. Upgrading a gauss rack allows for rounds to be bump-loaded, meaning conveyor belts can be laid from gauss ammo dispensers directly to upgraded racks.
 Superliminal Bluespace Artillery[edit | edit source]
Big Honking Space Gun, capable of not just annihilating your hearing, but also the enemy ship!
The Superliminal BSA is a massive machine which can accelerate a bolt of concentrated quark-gluon plasma to superliminal speeds, tearing clean through targets and annihilating everything in its path. It was developed from Bluespace Artillery cannons acquired in questionably legal way.
Operating it is simple, maintaining it is harder. It requires a massive amount of power just to fire even once. To input this power, simply go to it's console, set a desired amount of incoming power, and enamble charging.
Ensure that it has a clear firing path to space.
Flak cannons[edit | edit source]
Flak cannons fire a large amount of proximity-detonated ammunition at incoming torpedos and missiles.
They excel at defending against these forms of weaponry, but they have very limited range.
Operating them is simple:
- Go to the empty loading rack on the wall
- Insert a Full Flak Ammo Box

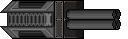
 NT-ST049 'Sturm' coaxial railgun[edit | edit source]

A hybrid Railgun Weapon, capable of switching between firing Railgun Slugs and Deck Gun Shells.
The Coaxial Railgun is a weapon that uses both Power and Physical Ammunition to fire a range of projectiles at the enemy vessels, however due to its mechanical parts, the thing requires maintenance from time to time.
The Coaxial Railgun, much like all railguns, uses electricity to produce a magnetic field in order to rapidly accelerate their ammunition, it is due to this reason that you need to keep an eye on the magnetic alignment of the field.
If the field degrades too much it will affect the projectile velocity and increase the chances of a misfiring incident occurring.
The weapon is capable of being switching configuration between firing Railgun Slugs and Deck Gun Shells pretty easily.
Operating the Railgun is a relatively easy thing to do:
- Interact with the weapon to bring up its UI.
- Drag the Power Allocation slider to the users desired allocation of power. Please note that this will result in a passive drain on the vessels power supply, so do not do this until the engine is setup and working properly.
- Switch Configuration "I4- Configuration:" to the Ammunition of Choice, options being Railgun Slugs and Deck Gun Shells:

- Insert the ammunition you have chosen, if it's Railgun slugs then insert 5 Railgun Slugs into the Weapon, otherwise insert 1 Deck Gun Shell that has been armed:
- Interact with the weapon again to bring up its UI and press the button labeled "I1 - Payload loaded"
- Press the button labeled "I2 - Payload chambered"
- Press the button labeled "I3 - Weapon safeties" to turn off the safeties and prime the Weapon for firing.
Maintenance[edit | edit source]
The Coaxial Railgun requires maintenance when its used too much and when the Magnetic Alignment is out of align. You probably want to perform maintenance between each bout of combat.
Note: Make sure there's nothing in the weapon and that the safeties are on.
In order to restore the Magnetic Alignment do the following:
- Unscrew the maintenance hatch on the primary external casing
- Unbolt (wrench) the internal maintenance panel
- Restore the Alignment using a Multitool
- Bolt (wrench) the panel.
- Screw the maintenance hatch back into place.
In order to repair the Gun Condition do the following:
- Unscrew the maintenance hatch on the primary external casing
- Unbolt (wrench) the internal maintenance panel
- Apply 10 units of Oil to the exposed internal machinery, repeat as needed
- Bolt (wrench) the panel, then fix (screwdriver) the hatch back in place
 SN 'Sucker Punch' Broadside Cannon[edit | edit source]
The Starship Equivalent of a shotgun
The Broadside Cannon is a weapon that requires the ship to have its side facing the enemy vessel before you fire it, otherwise the weapon will miss the target entirely.
The Broadside Cannon requires a secondary machine known as the Broadside Shell Packer Bench in order to produce the ammo for it. ![]()
Loading the Broadside Cannon is relatively simple process:
- Acquire Five Broadside Shell Casing:

- Insert the Casings into the Broadside Shell Packer Bench:
 =>
=> 
- Acquire Five Broadside Shell Loads:

- Insert the Loads into the Broadside Shell Packer Bench: =>

- Acquire the propellant of choice (either gunpowder or plasma-based accelerant):
- Insert your propellant of choice into the Broadside Shell Packer Bench: =>

- Interact with the Broadside Shell Packer Bench and hit "Pack Casings"
- Load the produced Broadside Shells into the Broadside Cannon:

- Voila! The Broadside Cannon is now ready to fire. After the cannon has fired repeat these steps if you have run out of ammo, otherwise repeat step 8
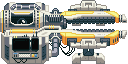 Magnetic Phoron Acceleration Caster[edit | edit source]
Moth Plasma Gun, for Ship destruction!
The phoron caster is a high maintenance weapon that requires a lot of attention to be fired and a lot of attention after it's fired.
The steps for firing are as follows:
- Locate a plasma gas canister and fasten it to the nearby connector:

- Turn on the gas regulator, this will begin to fill up the Plasma Capacitor Charge on the weapon's UI.

- Once the Capacitor Charge is at 100%, turn off the gas regulator.
- Take a phoron core and insert it into the main weapon itself

- On the weapon's UI, click the "Condense Phoron Mass button"
- On the weapon's UI, click the "Commence Magnetic Charge"
- On the weapon's UI, click the "Release Constrictor Field button". This button acts as a safety and will constantly lower the Field Integrity.
- Use the TAC Console on the bridge to fire the weapon.

Warnings:
- Every time the weapon is fired or misfires, the weapon's Alignment will degrade.
- If the weapon's alignment is less than 90%, is has a greater chance of misfiring.
- The weapon will not fire if the gas regulator is on or if the splines aren't fully restored.
- When the weapon is fired, the Splines will automatically go to 0%. This will replenish over time.
- Do not try to disassemble this weapon, you will regret it.
- The gas regulator will only take plasma gas, and no other gas.
- If the weapon's splines or field integrity stop restoring for any reason, toggle the constrictor field off and on again.
- This weapon will blind you if you're not wearing eye protection while in its presence.
- This weapon cannot target fighters or other small ships.
 Burst Phaser MK2[edit | edit source]

A coaxial laser system, capable of firing controlled laser bursts at a target.
These energy weapons are fired in the direction the ship is currently facing, and is fired by the Ship Pilot, as such you need to point the nose of the ship directly at the enemy in order to have a guaranteed chance of hitting it.
Due to being an energy weapon these guns primarily do not require a constant dedication of attention in order to maintain them, however they require a constant source of power:
- Interact with the Burst Phaser Weapon
- Toggle the Slider to the amount of power you wish to pump into the cannon, this affects how fast it recharges and how many shots it can fire before needing to recharge.
- Press the "Enable Charging" button and, assuming you have enough power in the grid, the gun will charge up and be ready to fire.
 Phase Cannon[edit | edit source]

An extremely powerful directed energy weapon which is capable of delivering a devastating beam attack.
This energy weapon behaves similarly to the Deck Guns in terms of aiming, meaning you can be performing a valiant tactical advance in the opposite direction of the enemy and still have a vague chance to hit the target.
Due to being an energy weapon these guns primarily do not require a constant dedication of attention in order to maintain them, however they require a constant source of power:
- Interact with the Phase Cannon
- Toggle the Slider to the amount of power you wish to pump into the cannon, this affects how fast it recharges and how many shots it can fire before needing to recharge.
- Press the "Enable Charging" button and, assuming you have enough power in the grid, the gun will charge up and be ready to fire.
 Laser Anti Missile System[edit | edit source]

The Energy Weapon equivalent of a modified Autonomous Missile System
Primarily designed to shoot down missiles using lasers rather than firing missiles at missiles and hoping it will work itself out, could probably be used for other shenanigans, such as boiling eggs
Due to being an energy weapon these guns primarily do not require a constant dedication of attention in order to maintain them, however they require a constant source of power:
- Interact with the Laser Anti Missile System
- Toggle the Slider to the amount of power you wish to pump into the cannon, this affects how fast it recharges and how many shots it can fire before needing to recharge.
- Press the "Enable Charging" button and, assuming you have enough power in the grid, the gun will charge up and be ready to fire.
Acquiring ammunition[edit | edit source]
This is inevitable, the ship will consume ammo at a rapid rate. If you are out of ammo outside of combat, the following list will instruct you on how to acquire more. If you are out of ammo mid-combat you're fucked , communicate this with CIC and the rest of your team and use what you have left for the other weapons while coordinating with cargo.
PDC[edit | edit source]
| Icon | Name | Purchasable | Crate Name |
|---|---|---|---|
| Point Defense Cannon Ammo (30.12x82mm) | Yes | PDC mount rounds (x5) |
Flak[edit | edit source]
| Icon | Name | Found |
|---|---|---|
| 40mm Flak Rounds | Acquired Through Traders |
Deck Gun[edit | edit source]
| Icon | Name | Purchasable | Crate Name | Researchable | Printable in |
|---|---|---|---|---|---|
| FTL-13 Naval Artillery Round | Yes | Naval Artillery Shells (x10) | Yes | Munitions Techfab | |
| Cannonballs | Yes | Cannonballs (x10) | No | N/A | |
| TX-101 Armour Penetrating Naval Artillery Round | No | N/A | Yes | Munitions Techfab | |
| Gunpowder Bag | Yes | Powder bags (x10) | Yes | Munitions Techfab | |
| Plasma-Based Projectile Accelerant | No | N/A | Yes | Munitions Techfab |
Torpedoes and Missiles[edit | edit source]
Torpedoes and missiles, unfortunately, cannot be ordered fully assembled and must be built by your own oil-covered hands. You need multiple things from cargo - components, casings, and warheads. Standard and armor piercing warheads can be ordered from cargo, but the other types must be researched by science before they can be made in the protolathe. Once you have all of these, turn on that conveyor belt and get this party started!
Missiles/Torpedoes |
Requires to build | How to build | Tools |
|---|---|---|---|
|
|
|
|
There are a total of six different types of torpedoes you can make. Each serves a different purpose.
- Standard torpedoes are your stock standard torps. They carry an explosive payload that does a fair amount of damage to ships and fighters alike.
- Armor piercing torpedoes are able to do heavy damage to armored targets. Good against large ships.
- Nuclear torpedoes are the most powerful of the explosive torpedoes. They deal devastating damage to anything they hit, but are slower and more expensive than the other torpedo types. Use them wisely, as you won't be able to make more until science researches them.
- Decoy torpedoes don't carry an explosive payload, but can be used to distract an enemy's defensive weapons, giving you a clear shot for your more powerful weapons.
- Freight torpedoes are essentially cargo pods. Load them up and fire them at another ship to deliver the goods.
- Probes are torpedoes strapped with an array of scientific sensors. Firing one of these at an anomaly will generate research for science, and potentially unlock new technology nodes. Don't miss.
Unfortunately it's only possible to construct one type of missile right now.
- High-velocity missiles are the standard missile type, they explode upon making impact and do a moderate amount of damage.
Autonomous Missile Factory[edit | edit source]

So you thought you had to wrench, weld and wire each missile individually? Of course not! The future is now! There's a quick and easy way to mass-produce missiles available right in the middle of your munitions bay: The factory line.
The Missile factory consists of three key parts: the conveyor belts, which have usually been slowed down to accommodate for the working speed of the robots. Tool arms, which use specific tools on the casing and are colored grey, and red colored part arms that apply parts such as guidance computers to the missiles. The robot arms in the factory always apply their effect in the direction the red arrows on their frame are pointing, but can be loaded with parts from any direction. They also have no part holding limit, so you can fill them up with as many parts as you want.
You can even extend the factory! The parts required for making factory machines can all be printed in the munilathe along with the conveyor belts after their research has been completed.
Broadside Cannon[edit | edit source]
To create more Broadside Shells, do the following:
- Acquire Five Broadside Shell Casing:
- Insert the Casings into the Broadside Shell Packer Bench: =>
- Acquire Five Broadside Shell Loads:
- Insert the Loads into the Broadside Shell Packer Bench: =>
- Acquire the propellant of choice (either gunpowder or plasma-based accelerant):
- Insert your propellant of choice into the Broadside Shell Packer Bench: =>
- Interact with the Broadside Shell Packer Bench and hit "Pack Casings"
To acquire more Shell casings or shell loads, see the following Table:
| Icon | Name | Purchasable | Crate Name |
|---|---|---|---|
| Broadside Shell Casing | Yes | Empty Broadside Casings/Broadside Pack | |
| Broadside Shell Loads | Yes | Broadside Loads/Broadside Pack |
Magnetic Phoron Acceleration Caster[edit | edit source]
|
|
This section contains Test Merged Information
This section is referencing a Test Merge. |
| Icon | Name | Researchable | Printable in |
|---|---|---|---|
| Condensed Phoron Core | Yes | Munitions Techfab |
NT-ST049 'Sturm' coaxial railgun[edit | edit source]
The method of acquiring more railgun slugs for this weapon is semi-complicated.
You need to locate the "Defunct Railgun Techology Munitions Technology Disk" which can be found in Munitions, assuming some clown hasn't eaten it or it's been dusted in the Supermatter shard.
With this Technology Disk you need to upload the blueprints to the Techweb using a Research and Development Console, DO NOT DELETE THE BLUEPRINTS CONTAINED ON IT.
After you have uploaded the blueprints you can now print the Railgun Slugs in either the Cargo or Munitions Techfab
You're ready[edit | edit source]
It may be difficult to swallow all of the information you've read, but don't worry! You'll very rarely be working with all of these weapons at once as you have fellow Munitions Technicians at your side to pick up your slack. Above all, remember to have fun. With a bottle of spray paint, you can do all manner of things - name your torpedo tubes, draw funny faces near the PDC racks, and draw the borderline between the rest of the ship and the newly independent Munitia.
More Dakka[edit | edit source]
Is the ships just floating around in friendly space? Are all the guns loaded and you have nothing better to do? Or are those glorified laser pointers simply not enough? Fear not, because now you can even BUILD more guns! From the smallest PDC to the largest Railgun, you can outfit your ship with all the firepower.
Disclaimer: You can't print new weapon circuit boards. This means that whatever weaponry you had roundstart, you are stuck with those. However, you can still move them.
With that out of the way, here is a tip if you want to arm your ship:
- Don't overestimate how much ammo you have. Because while making the ship into a giant sniper rifle with 20 NACs might be fun, cargo WILL swiftly run dry of credits trying to supply you with ammo. 30 PDCs WILL destroy all the Torpedoes launched at you, but the crew will easily go deaf from all the pom-pom-pom.
- For this reason, giving the Munitions budget card to cargo is highly recommended.
Here is how you can construct ship weaponry:
PDC loading rack[edit | edit source]
PDC loading rack |
Requires to build | How to build | |
|---|---|---|---|
| |||
| How to deconstruct | |||
| Tools |
| ||
|
| |||
Torpedo Tube[edit | edit source]
Torpedo Tube |
Requires to build | How to build | |
|---|---|---|---|
| |||
| How to deconstruct | |||
| Tools |
| ||
|
| |||
VLS launch tube[edit | edit source]
VLS launch tube |
Requires to build | How to build | |
|---|---|---|---|
| |||
| How to deconstruct | |||
| Tools |
| ||
|
| |||
[edit | edit source]
  Naval Artillery |
Requires to build | How to build | |
|---|---|---|---|
Building the indoors, multitile part[edit | edit source]
Building the outdoors part[edit | edit source]
| |||
| How to deconstruct | |||
| Tools |
The frame can be deconstructed this way:
The machines can be deconstructed this way:
| ||
|
| |||
As said before, this is advanced stuff, usually you don't need to build new guns, and it's one hell of a job to try and keep them all loaded. But it does take up the downtime that you otherwise would have spent in the bar, and some weird people might find it fun.
*Nanotrasen brand gunpowder is not suitable for use in hot or burning environments, keep away from children with lighters.